|
|
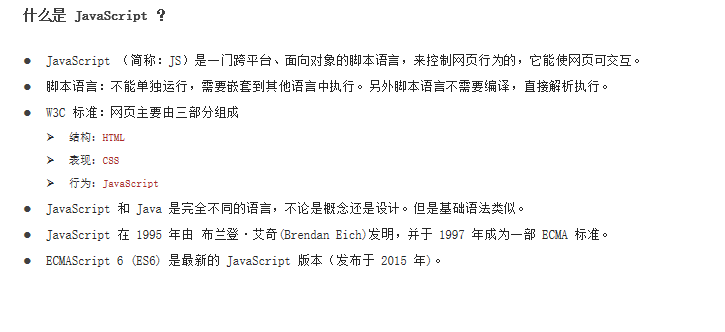
JavaScript简介
JavaScript引入方式
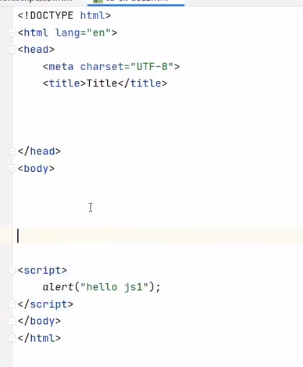
1.内部脚本
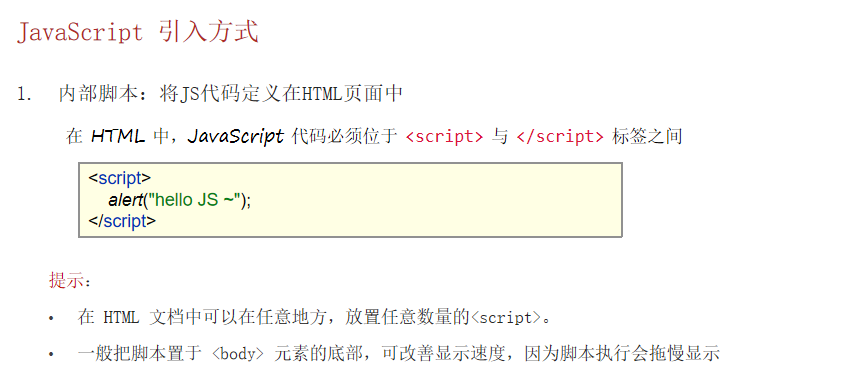
//alert是弹出警告框
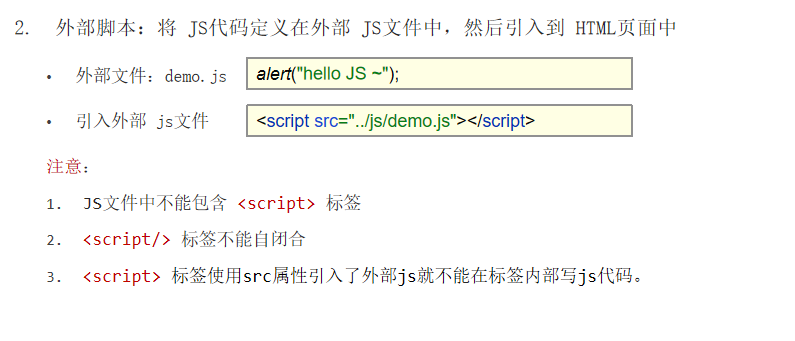
2.外部脚本
<!DOCTYPE html>
<html lang=&#34;en&#34;>
<head>
<meta charset=&#34;UTF-8&#34;>
<title>Title</title>
</head>
<body>
<!--内部引入-->
<!--<script>
alert(&#34;警告框 1***&#34;)
</script>-->
<!--外部引入-->
<script src=&#34;style1.js&#34;></script>
</body>
</html>
//style1.js
alert(&#34;警告框 2&#34;);
alert(&#34;警告框 3&#34;);
alert(&#34;警告框 4&#34;);
JavaScript基础语法
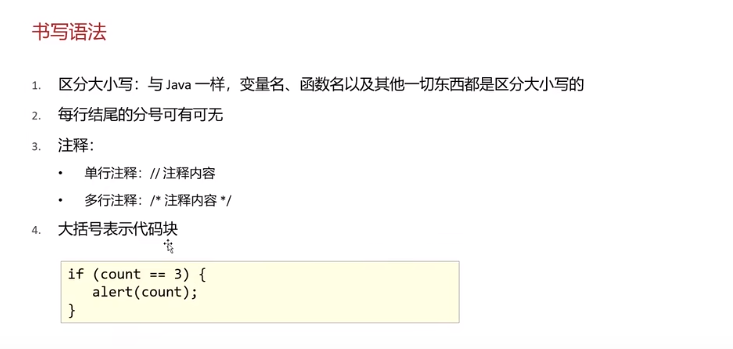
1.书写语法
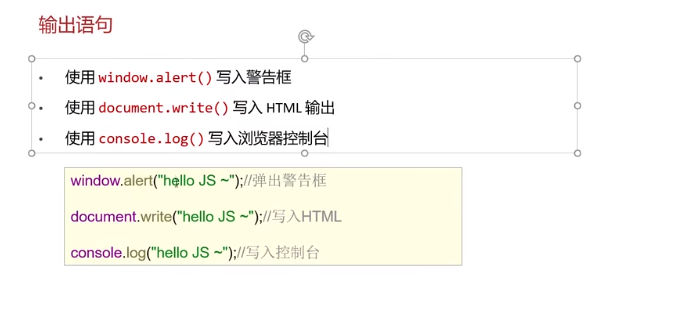
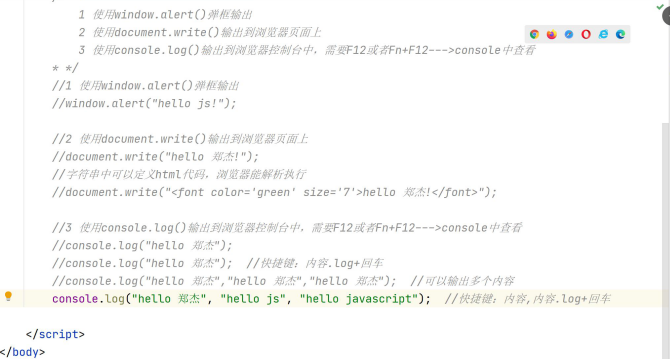
2.输出语句
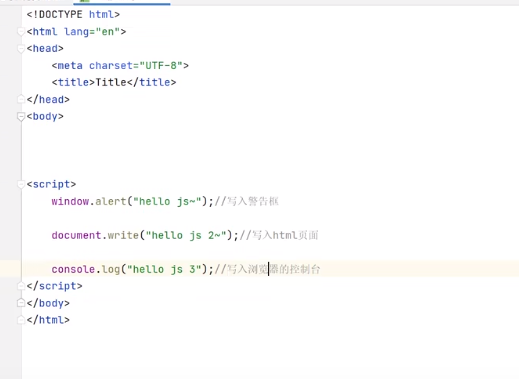
<!DOCTYPE html>
<html lang=&#34;en&#34;>
<head>
<meta charset=&#34;UTF-8&#34;>
<title>Title</title>
</head>
<body>
<script>
window.alert(&#34;hello js 1&#34;);
document.write(&#34;hello js 2&#34;);
console.log(&#34;hello js 3&#34;);
</script>
</body>
</html>3.变量
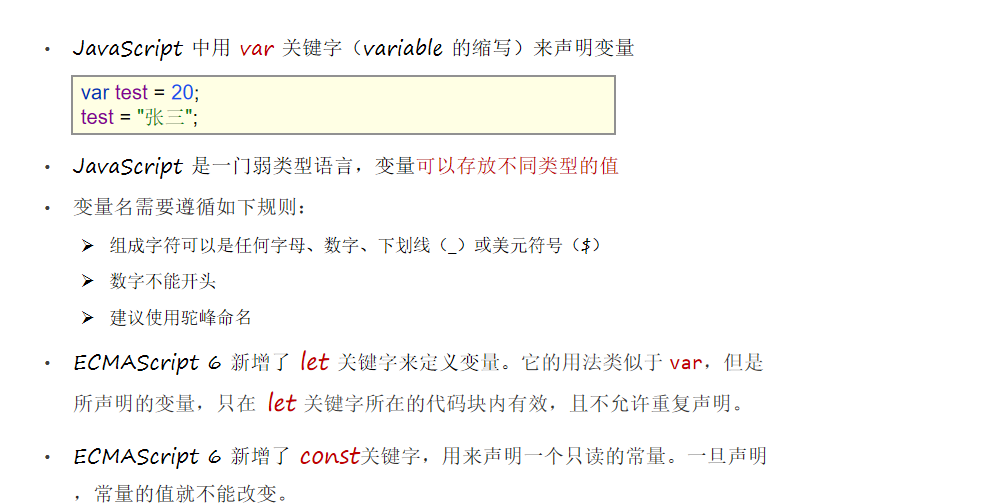
var 关键字
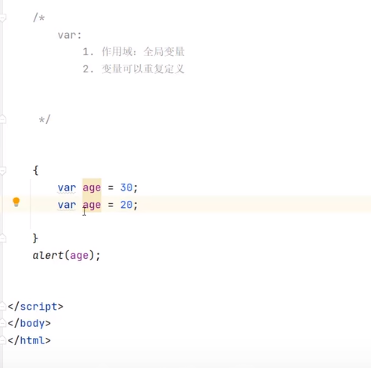
作用域:全局变量
{
var age = 20;
}
alert(age); // 在代码块中定义的age 变量,在代码块外边还可以使用
变量可以重复定义
{
var age = 20;
var age = 30;//JavaScript 会用 30 将之前 age 变量的 20 替换掉
}
alert(age); //打印的结果是 30let关键字
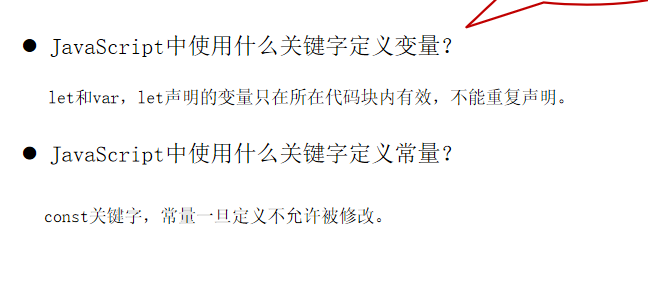
它的用法类似于 var,但是所声明的变量,只在 let 关键字所在的代码块内有效,且不允许重复声明。
例如:
{
let age = 20;
}
alert(age);
运行上面代码,浏览器并没有弹框输出结果,说明这段代码是有问题的。通过 ctrl+shift+i 打开开发者模式可以看到如下错误信息
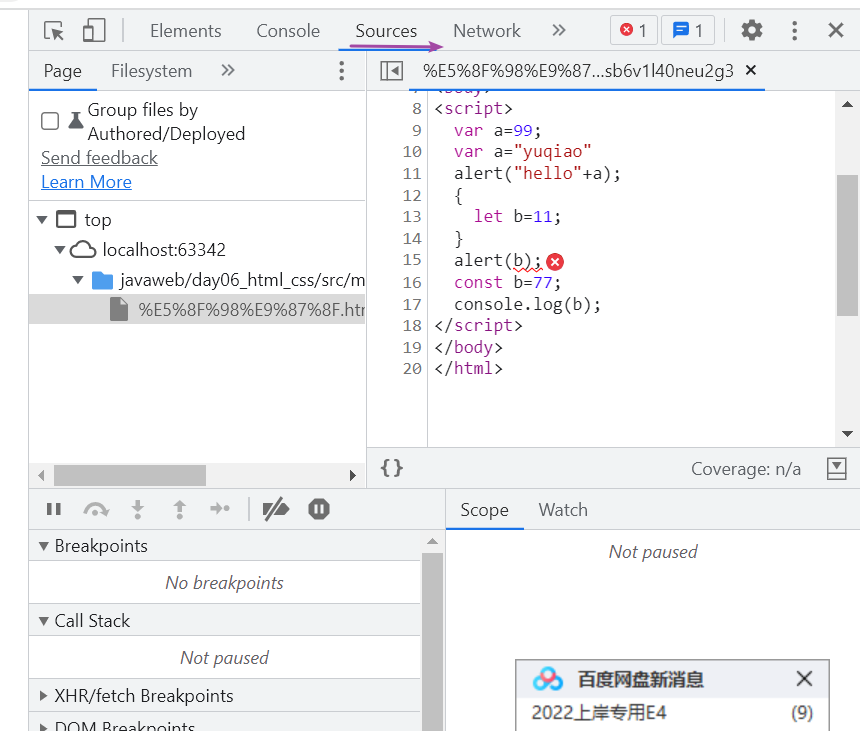
const关键字
用来声明一个只读的常量。一旦声明,常量的值就不能改变。

<!DOCTYPE html>
<html lang=&#34;en&#34;>
<head>
<meta charset=&#34;UTF-8&#34;>
<title>Title</title>
</head>
<body>
<script>
var a=99;
var a=&#34;yuqiao&#34;
alert(&#34;hello&#34;+a);
{
let b=11;
alert(b);
}
const b=77;
console.log(b);
</script>
</body>
</html>
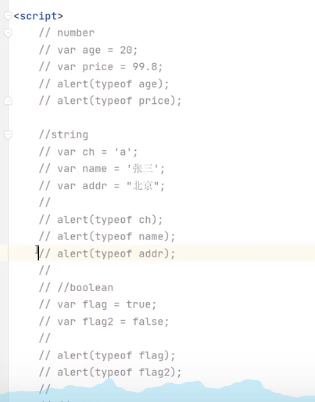
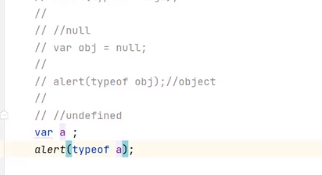
4.数据类型
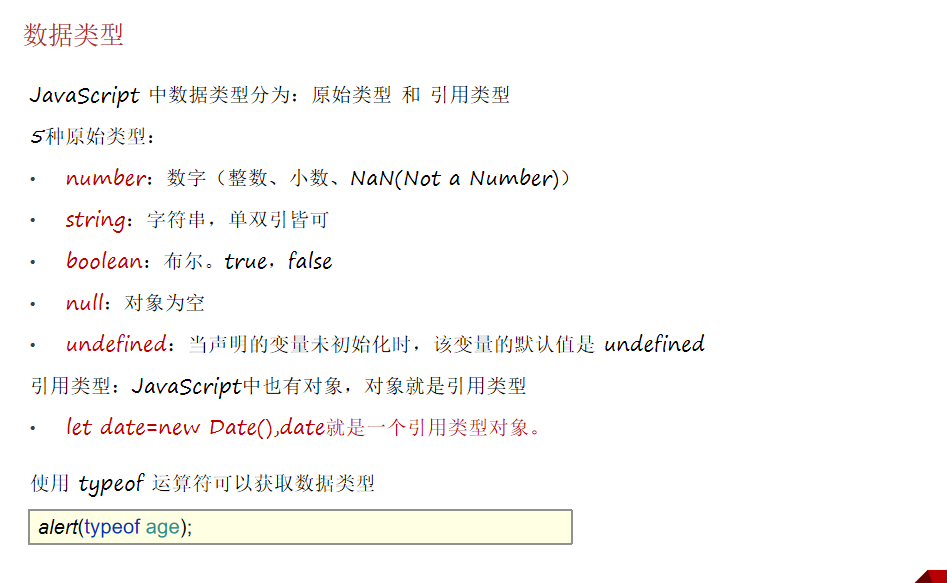
typeof弹出的为对于数据的数据类型
<!DOCTYPE html>
<html lang=&#34;en&#34;>
<head>
<meta charset=&#34;UTF-8&#34;>
<title>Title</title>
</head>
<body>
<script>
//number
var a=100;
var a1=99.8;
alert(typeof a);
alert(typeof a1);
//string
var c=&#39;咖啡&#39;;
var c2=&#39;a&#39;;
var c3=&#34;卡夫卡&#34;;
alert(typeof c);
alert(typeof c2);
alert(typeof c3);
//boolean
var d=false;
var d1=true;
alert(typeof d);
alert(typeof d1);
//null object
var e=null;
alert(typeof e);
//undefined
var f;
alert(typeof f);
</script>
</body>
</html>
//老师代码
/* let n1=100;
let n2=-13.14
let n3=NaN; //数字类型的一个标识。
console.log(n1, typeof n1);//100 &#39;number&#39;
console.log(n2, typeof n2);//-13.14 &#39;number&#39;
console.log(n3, typeof n3);//NaN &#39;number&#39;
console.log(&#34;---------------------&#34;);
//2 定义string字符串类型变量:单双引皆可
let s1=&#34;hello&#34;;
let s2=&#39;hello js&#39;;
console.log(s1, typeof s1);//hello string
console.log(s2, typeof s2);//hello js string
console.log(&#34;---------------------&#34;);
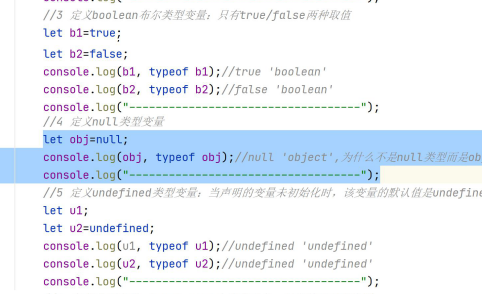
//3 定义boolean布尔类型变量:只有true/false两种取值
let b1=true;
let b2=false;
console.log(b1, typeof b1);//true boolean
console.log(b2, typeof b2);//false boolean
console.log(&#34;---------------------&#34;);
//4 定义null类型变量
let o=null;
console.log(o, typeof o);//null &#39;object&#39; ???
console.log(&#34;---------------------&#34;);
//5 定义undefined类型变量:当声明的变量未初始化时,该变量的默认值是undefined
let u1=undefined;
let u2;
console.log(u1, typeof u1);//undefined &#39;undefined&#39;
console.log(u2, typeof u2);//undefined &#39;undefined&#39;
console.log(&#34;---------------------&#34;);
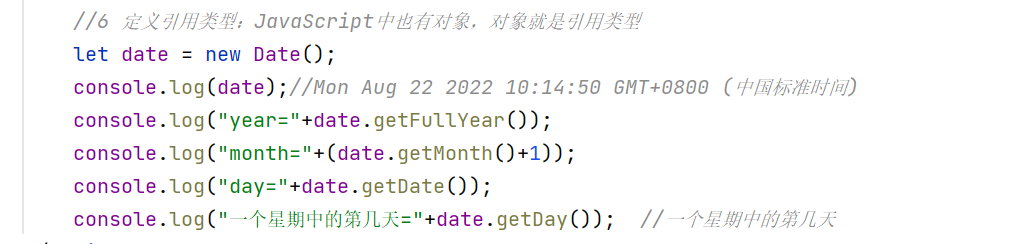
//6 定义引用类型:JavaScript中也有对象,对象就是引用类型
let date = new Date();
console.log(date);//Mon Aug 22 2022 10:14:50 GMT+0800 (中国标准时间)
console.log(&#34;year=&#34;+date.getFullYear());
console.log(&#34;month=&#34;+(date.getMonth()+1));
console.log(&#34;day=&#34;+date.getDate());
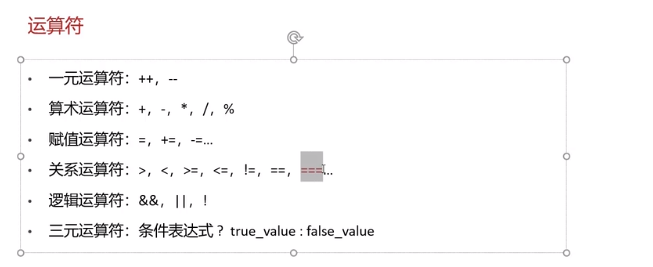
console.log(&#34;一个星期中的第几天=&#34;+date.getDay()); //一个星期中的第几天*/5.运算符
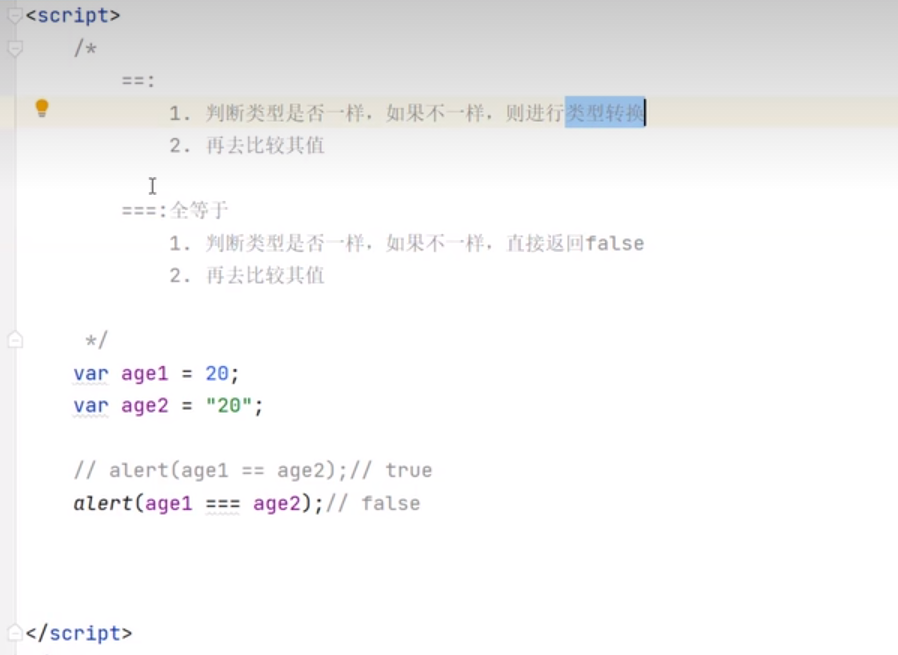
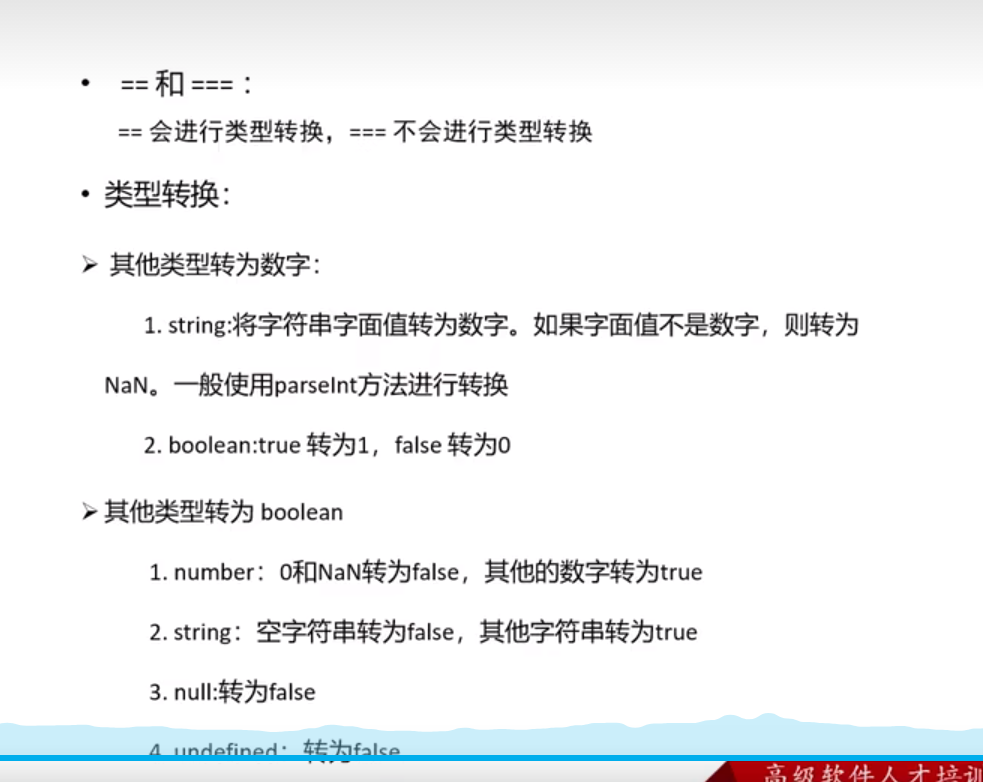
==和===区别
概述:
- ==:判断类型是否一样,如果不一样,则进行类型转换再去比较其值
- ===:js 中的全等于判断类型是否一样,如果不一样,直接返回false,再去比较其值
<!DOCTYPE html>
<html lang=&#34;en&#34;>
<head>
<meta charset=&#34;UTF-8&#34;>
<title>Title</title>
</head>
<body>
<script>
var a=20;
var b=&#34;20&#34;;
alert(a==b);//true
alert(a===b);//false
</script>
</body>
</html>
类型转换
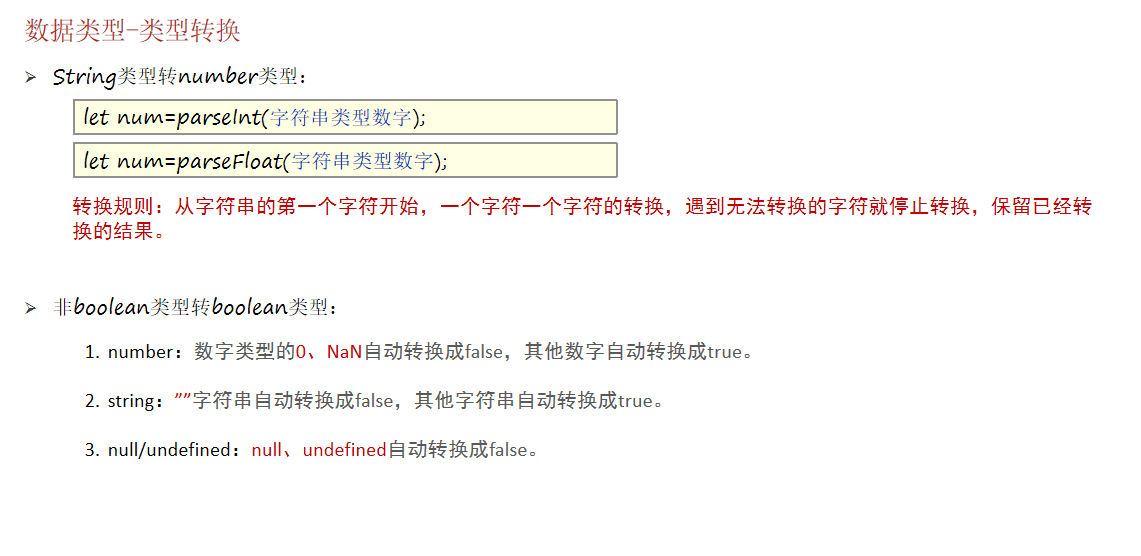
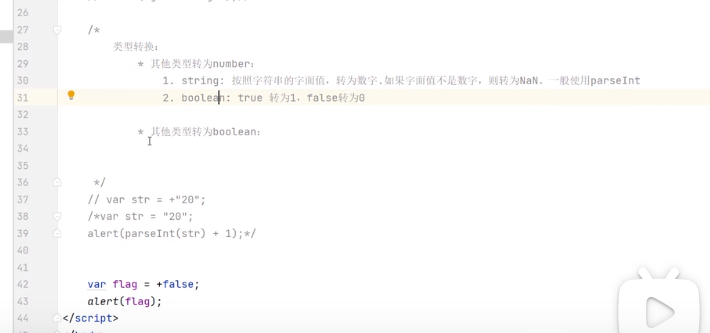
- 其他类型转为number
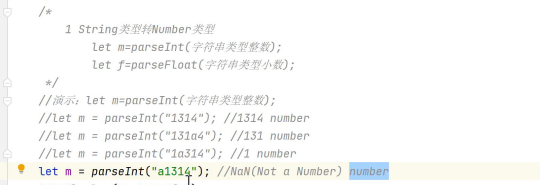
- string 转换为 number 类型:按照字符串的字面值,转为数字。如果字面值不是数字,则转为NaN
将 string 转换为 number 有两种方式:
//1.使用 + 正号运算符:
var str = +&#34;20&#34;;
alert(str + 1) //21
使用 parseInt() 函数(方法):
var str = &#34;20&#34;;
alert(parseInt(str) + 1);
//2.==建议使用 parseInt() 函数进行转换。==
boolean 转换为 number 类型:true 转为1,false转为0
var flag = +false;
alert(flag); // 0
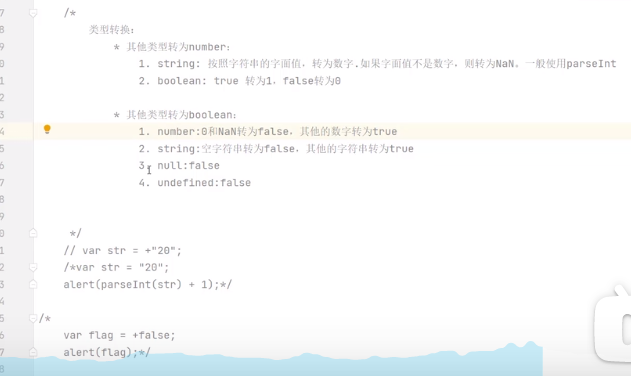
- 其他类型转为boolean
- number 类型转换为 boolean 类型:0和NaN转为false,其他的数字转为true
- string 类型转换为 boolean 类型:空字符串转为false,其他的字符串转为true
- null类型转换为 boolean 类型是 false
- undefined 转换为 boolean 类型是 false
代码如下:
// var flag = 3;
// var flag = &#34;&#34;;
var flag = undefined;
if(flag){
alert(&#34;转为true&#34;);
}else {
alert(&#34;转为false&#34;);
}使用场景:
<!DOCTYPE html>
<html lang=&#34;en&#34;>
<head>
<meta charset=&#34;UTF-8&#34;>
<title>Title</title>
</head>
<body>
<script>
/* var a=&#34;20&#34;;
alert(+a);
alert(parseInt(a))
var b=false;
alert(+b);
var b1=true;
alert(+b1);*/
/*var flag=0;*/
var flag=1;
var flag=null;
var flag;
if(flag){
alert(&#34;转为true&#34;);
}else{
alert(&#34;转为false&#34;)
}
</script>
</body>
</html>健壮性判断
在 Java 中使用字符串前,一般都会先判断字符串不是null,并且不是空字符才会做其他的一些操作,JavaScript也有类型的操作,代码如下:
var str = &#34;abc&#34;;
//健壮性判断
if(str != null && str.length > 0){
alert(&#34;转为true&#34;);
}else {
alert(&#34;转为false&#34;);
}
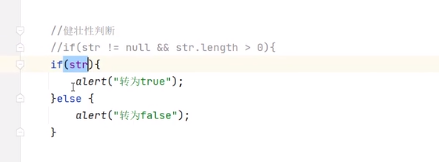
但是由于 JavaScript 会自动进行类型转换,所以上述的判断可以进行简化,代码如下:
var str = &#34;abc&#34;;
//健壮性判断
if(str){
alert(&#34;转为true&#34;);
}else {
alert(&#34;转为false&#34;);
}
6.流程控制语句
7.流程控制语句
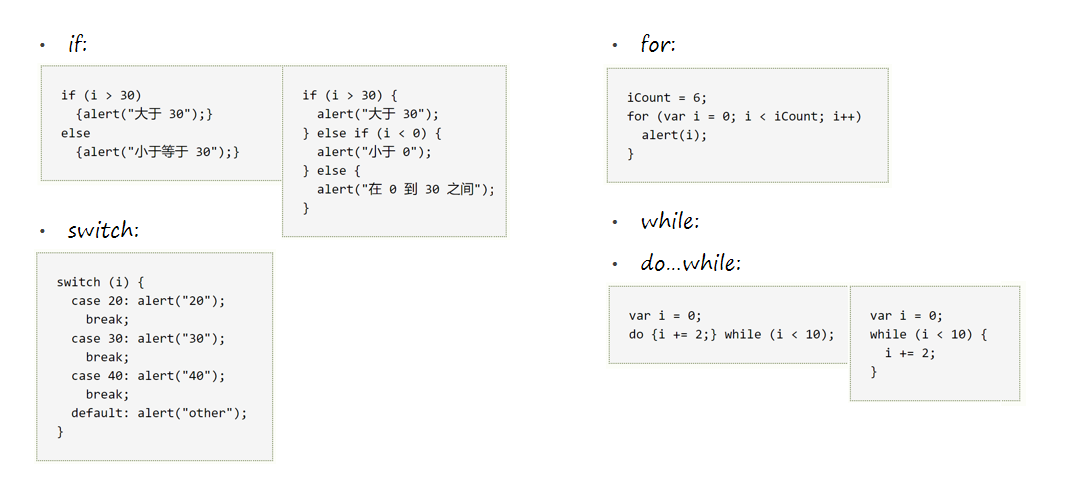
(同java语法一样,需要注意的是for循环中的变量i,建议使用let修饰符)
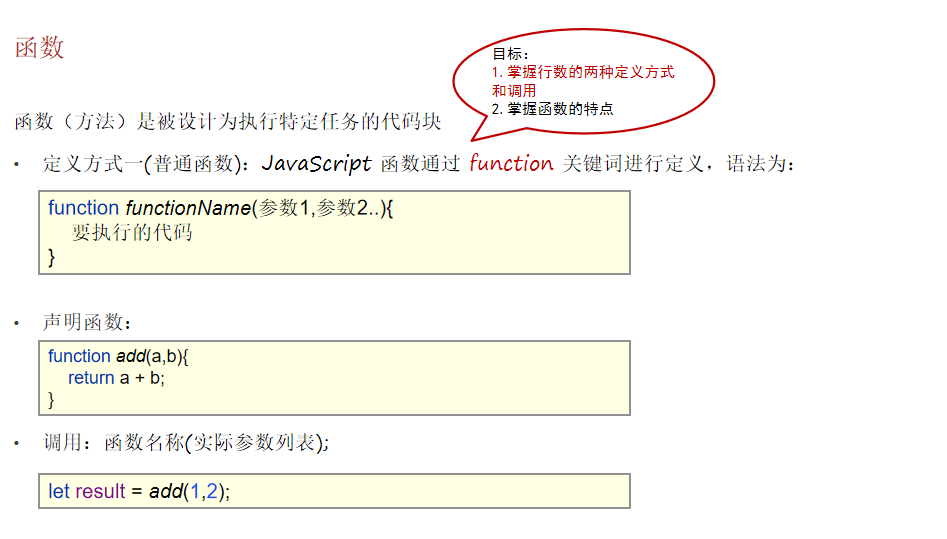
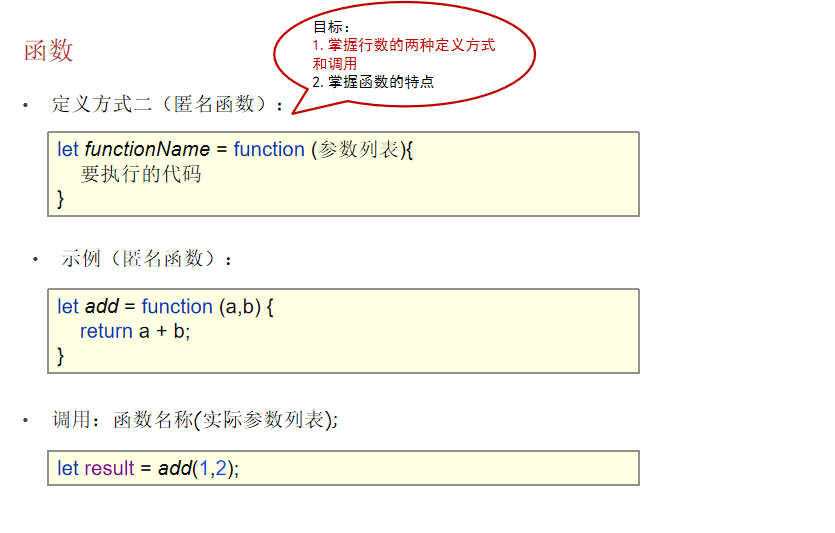
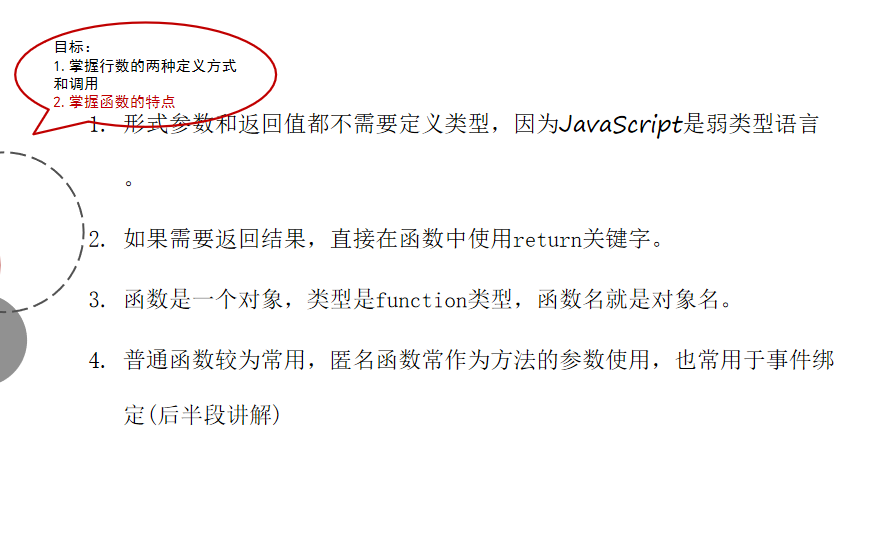
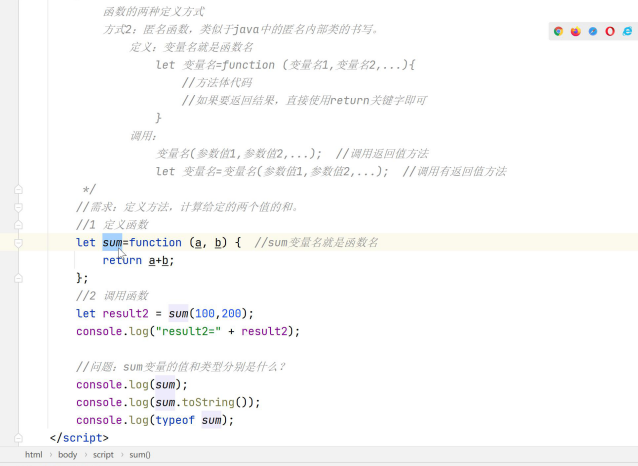
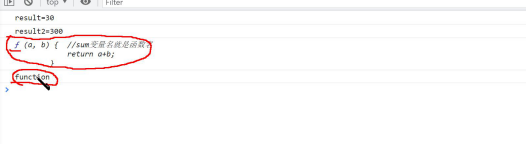
8.函数
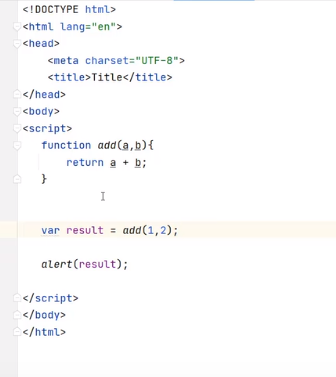
<!DOCTYPE html>
<html lang=&#34;en&#34;>
<head>
<meta charset=&#34;UTF-8&#34;>
<title>Title</title>
</head>
<body>
<script>
/*function add(a,b){
return a+b;
}
var result=add(1,4);
alert(result);*/
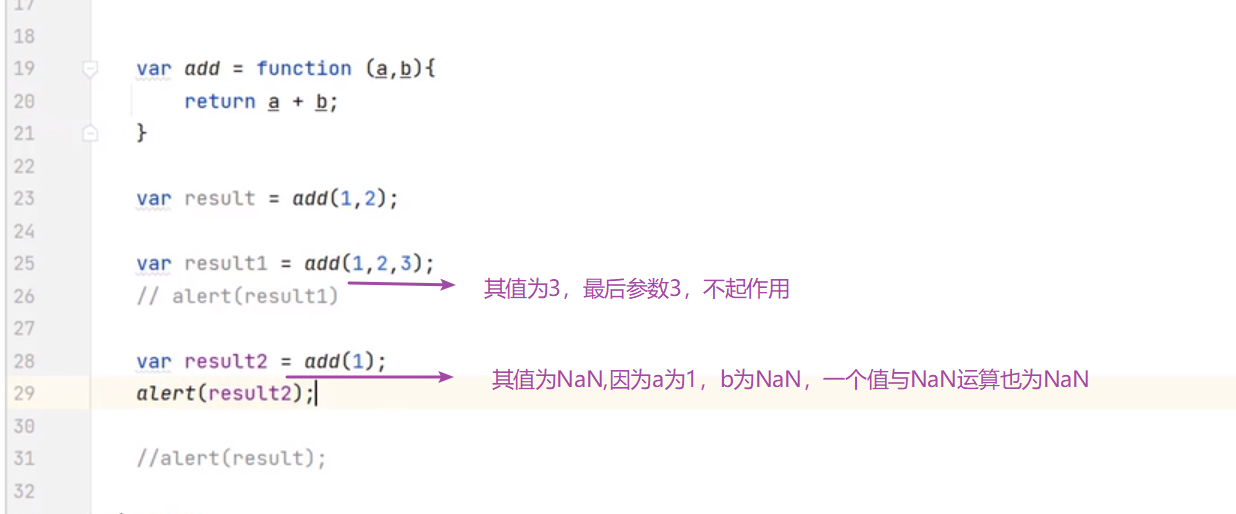
var add=function(a,b){
return a+b;
}
var result1=add(1,7);
var result2=add(1,7,5);
var result3=add(1);
alert(result1);//8
alert(result2);//8
alert(result3);//NaN
</script>
</body>
</html>
//n-m的值
function add(n,m){
var sum=0;
for(let i=n;i<=m;i++){
sum=sum+i;
}
return sum;
}
let result=add(1, 10)
console.log(result);
let add1=function(n,m){
var sum=0;
for(let i=n;i<=m;i++){
sum=sum+i;
}
return sum;
}
let result2=add1(1, 10)
console.log(result2);
JavaScript对象
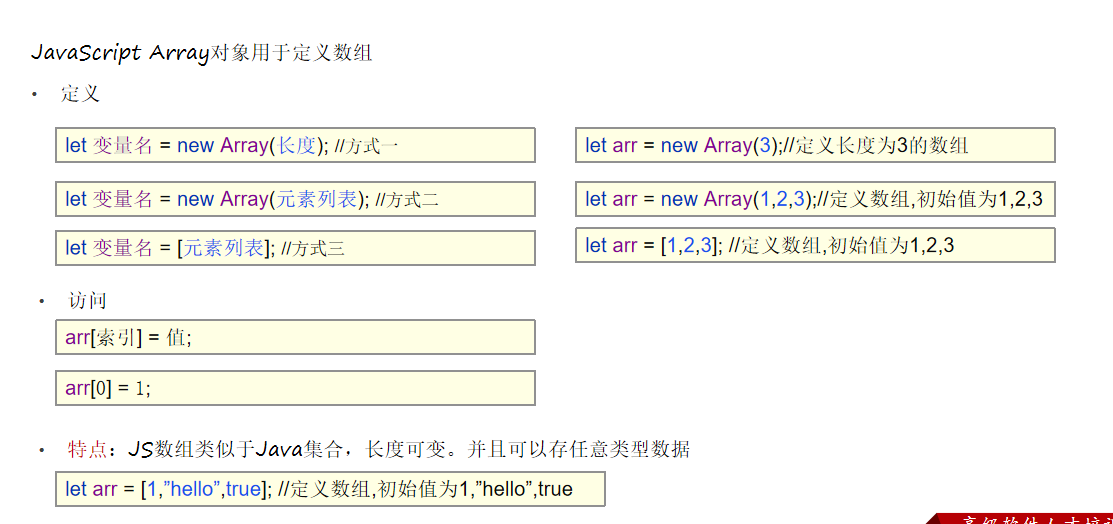
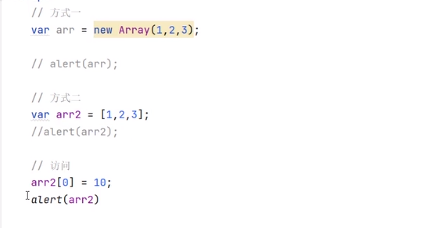
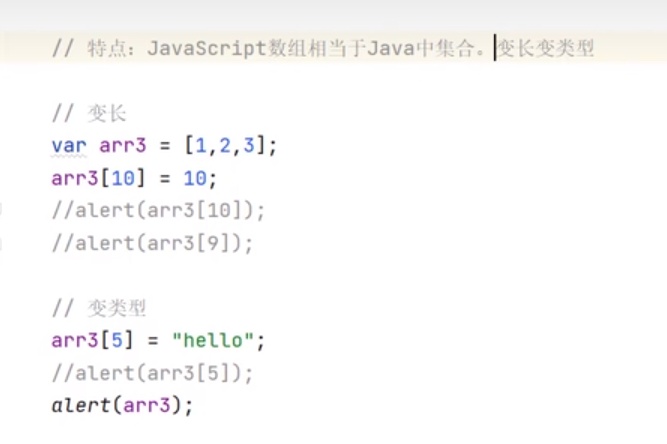
1.Array
<!DOCTYPE html>
<html lang=&#34;en&#34;>
<head>
<meta charset=&#34;UTF-8&#34;>
<title>Title</title>
</head>
<body>
<script>
var a=new Array(1,2,3,4,5);
alert(a);
var b=[1,3,5,7]
alert(b);
var c=new Array(3);
c[0]=1;
c[1]=0
c[2]=7;
c[3]=9
alert(c);
var d=[1,3,5];
d[7]=&#39;hello&#39;;
d[10]=false;
alert(d);
</script>
</body>
</html>
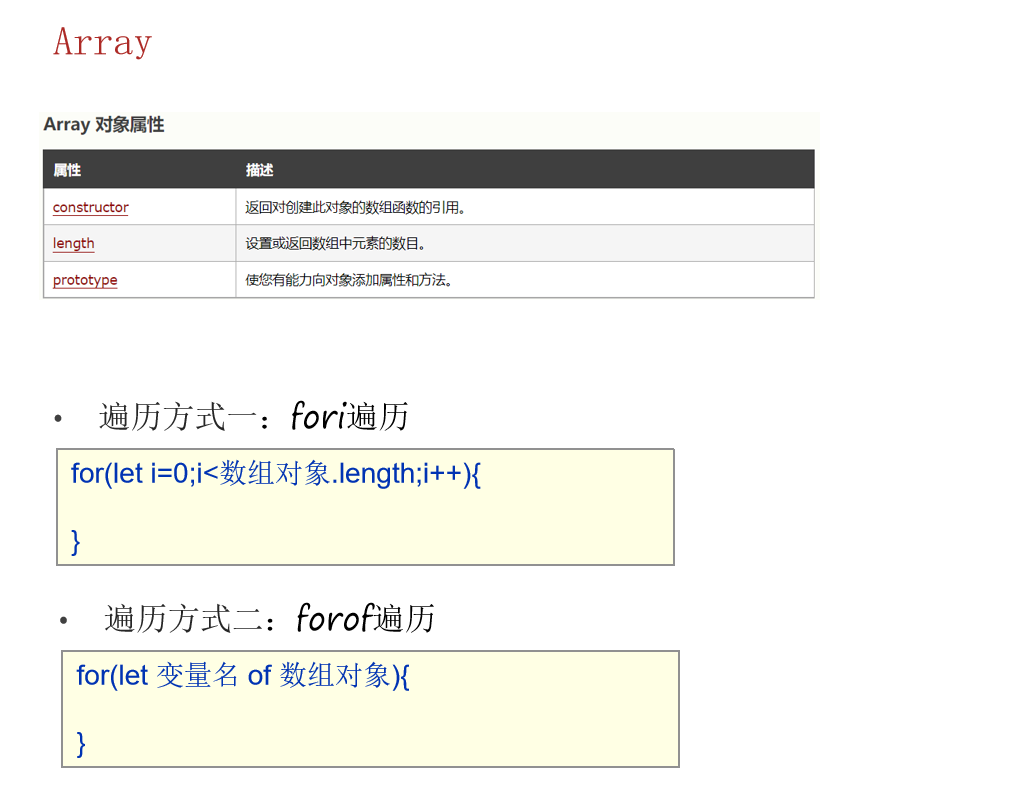
var d=[1,3,5,7];
for(let i=0;i<d.length;i++){
alert(d);
}
for(let i of d){
alert(i);
}
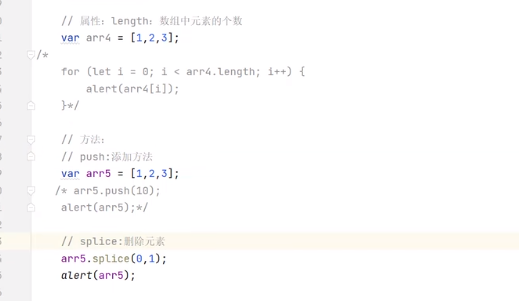
d.push(9);
d.push(11);
alert(d);
d.splice(0,3);
alert(d);
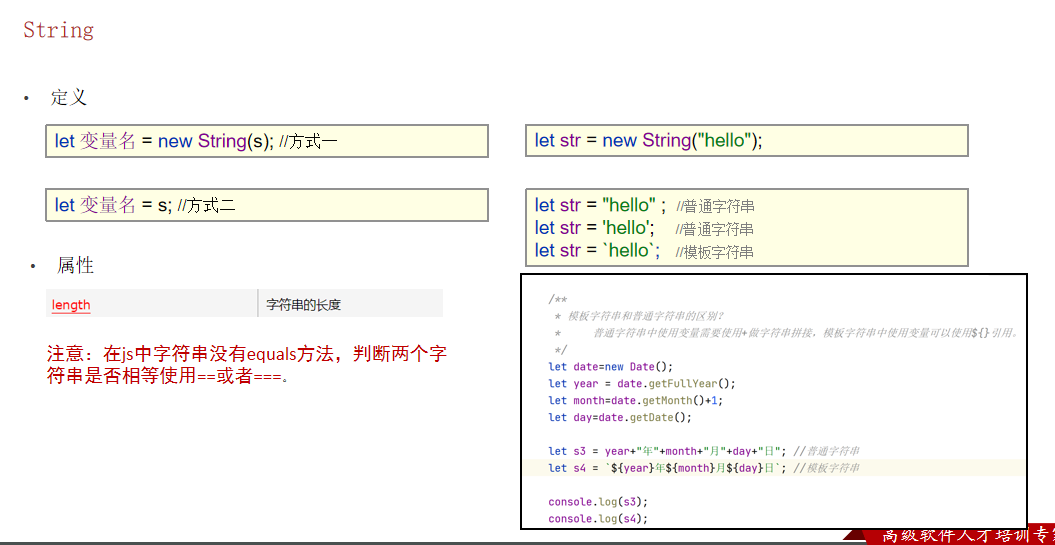
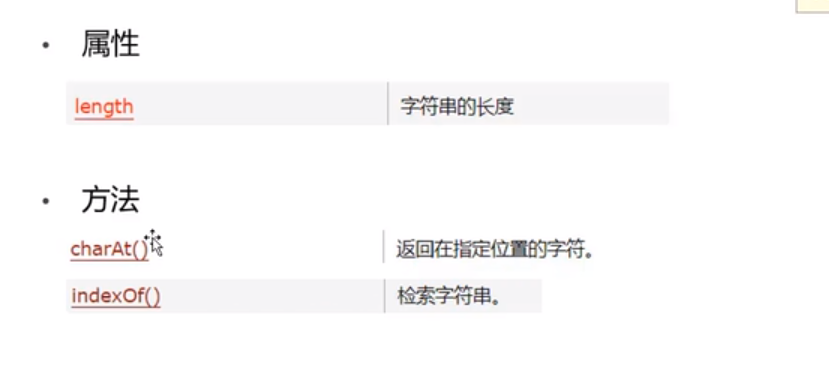
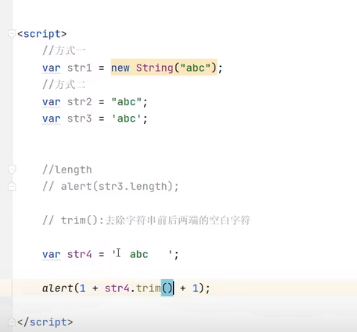
2.String
<!DOCTYPE html>
<html lang=&#34;en&#34;>
<head>
<meta charset=&#34;UTF-8&#34;>
<title>Title</title>
</head>
<body>
<script>
var str=new String(&#34;hello world&#34;);
var str1=&#34; 12345 &#34;
alert(str.length);
alert(1+str.trim()+1);
</script>
</body>
</html>
<!DOCTYPE html>
<html lang=&#34;en&#34;>
<head>
<meta charset=&#34;UTF-8&#34;>
<title>常用对象-String对象</title>
</head>
<body>
<script>
let date=new Date();
let year=date.getFullYear();
let month=date.getMonth()+1;
let day=date.getDate();
console.log(year + &#34;年&#34; + month + &#34;月&#34; + day + &#34;日&#34;);
console.log(`${year}年${month}月${day}日`);
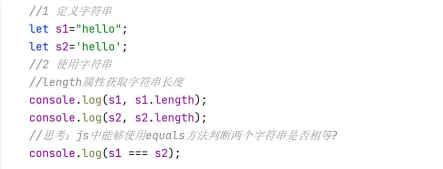
/* //1 定义字符串
let s1=&#34;2022年8月22日&#34;;
let s2=&#39;2022年8月22日&#39;;
let s3=`2022年8月22日`;
//2 使用字符串
//length属性获取字符串长度
console.log(s1.length, s2.length, s3.length);
//思考:js中能够使用equals方法判断两个字符串是否相等?
//s1.equals(s2); // s1.equals is not a function
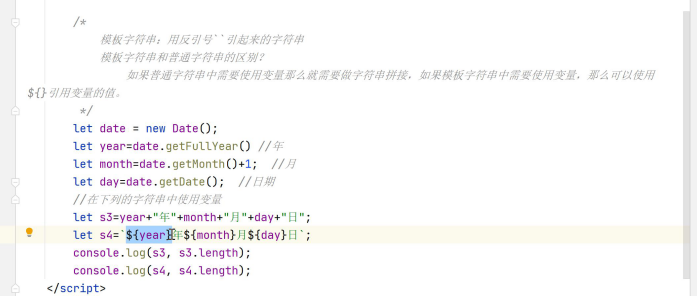
/!*
模板字符串和普通字符串的区别?
如果普通字符串中需要使用变量,那么就需要做字符串拼接。
如果模板字符串中需要使用变量,可以使用${表达式}来引用变量的值。
*!/
//创建Date对象,获取年月日
let date = new Date();
let year = date.getFullYear();//年
let month=date.getMonth()+1//月
let day = date.getDate();//日
//定义字符串,展示当前年月日
let s4=year+&#39;年&#39;+month+&#39;月&#39;+day+&#39;日&#39;;
let s5=`${year}年${month}月${day}日`;
console.log(s4, s5);*/
</script>
</body>
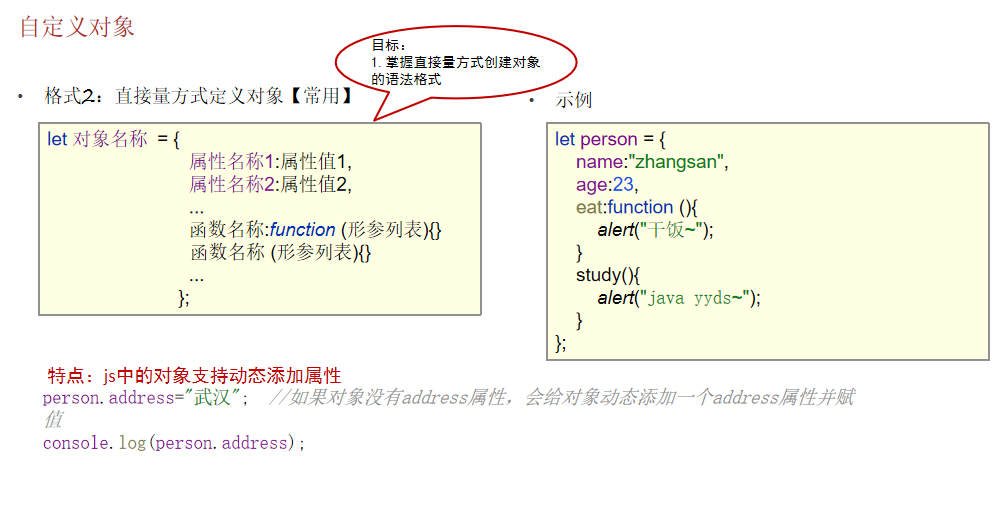
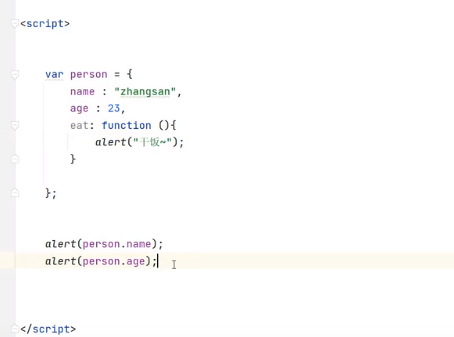
</html>3.自定义对象

<!DOCTYPE html>
<html lang=&#34;en&#34;>
<head>
<meta charset=&#34;UTF-8&#34;>
<title>Title</title>
</head>
<body>
<script>
let people={
name:&#34;zhangsan&#34;,
age:23,
eat(){
alert(&#34;吃东西&#34;)
},
};
alert(people.name);
alert(people.age);
people.eat();
</script>
</body>
</html>
//
<!DOCTYPE html>
<html lang=&#34;en&#34;>
<head>
<meta charset=&#34;UTF-8&#34;>
<title>常用对象-自定义对象</title>
</head>
<body>
<script>
let person={
name:&#34;zhangsan&#34;,
age:22,
eat(){
alert(this.name+&#34;在干饭&#34;);
},
study:function(s){
alert(`${this.name}在学习${s}`);
}
}
console.log(person.name, person.age);
person.address=&#34;武汉&#34;;
console.log(person.name, person.age,person.address);
console.log(person.eat());
console.log(person.study(&#34;java&#34;));
/* /!*
let 对象名称 = {
属性名称1:属性值1,
属性名称2:属性值2,
...
函数名称:function (形参列表){},
函数名称 (形参列表){}
...
};
*!/
//1 定义对象,有name和age属性,有eat()方法和study()方法
let person={
name:&#34;snake&#34;,
age:20,
eat:function () {
alert(&#34;干饭!&#34;)
},
study(){
alert(&#34;学习java&#34;);
}
}
//2 使用对象
//2.1 访问属性
console.log(person.name, person.age);
person.name=&#34;张益达&#34;;
console.log(person.name, person.age);
//2.2 访问方法
person.eat();
person.study();
//特点:js中的对象支持动态扩展属性,如果没有这个属性就创建该属性并赋值
person.address=&#34;武汉&#34;;
console.log(person.name, person.age,person.address);
//let user={}; //允许
//user.name=&#34;张益达&#34;;*/
</script>
</body>
</html>
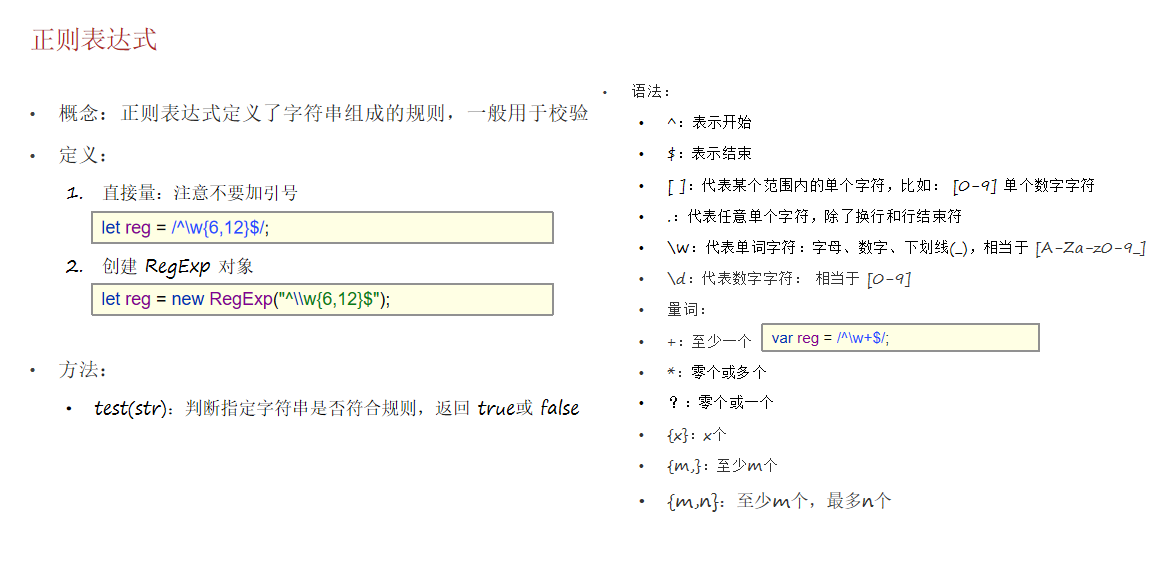
4.正则表达式
/* //需求1:校验用户名,要求:6~12位字母、数字、下划线
//1 定义正则表达式对象
let regExp=/^\w{6,12}$/;
//2 调用test方法校验
console.log(regExp.test(&#34;snake&#34;));//false
console.log(regExp.test(&#34;snake666&#34;));//true
console.log(regExp.test(&#34;snake@66&#34;));//false
console.log(&#34;----------------&#34;);
//需求2:校验邮箱
//1 定义正则表达式对象
regExp=/^\w+([-+.]\w+)*@\w+([-.]\w+)*\.\w+([-.]\w+)*$/;
//2 调用test方法校验
console.log(regExp.test(&#34;snake@&#34;));//false
console.log(regExp.test(&#34;snake@163.com&#34;));//true
console.log(regExp.test(&#34;snake163.com&#34;));//false
console.log(&#34;----------------&#34;);
//需求3:校验手机号
//1 定义正则表达式对象
regExp=/^1[356789]\d{9}$/;
//2 调用test方法校验
console.log(regExp.test(&#34;12512341234&#34;));//false
console.log(regExp.test(&#34;13512341234&#34;));//true
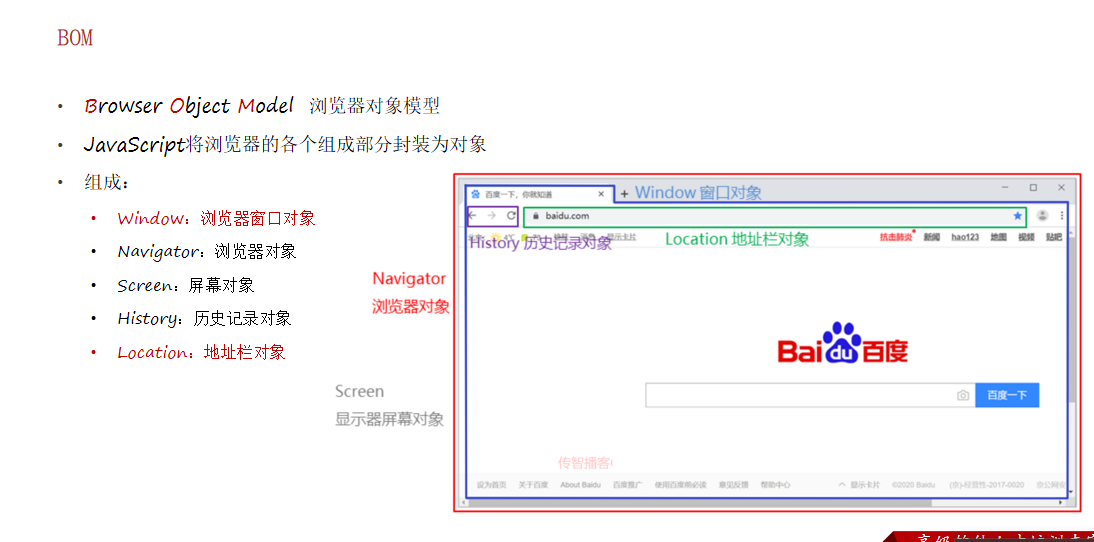
console.log(regExp.test(&#34;1351234126&#34;));//false*/BOM
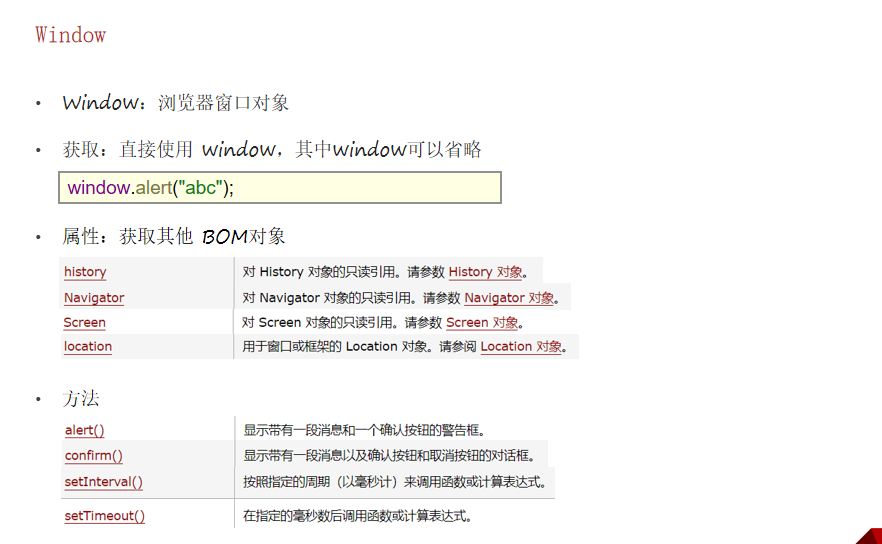
1.window对象
<!DOCTYPE html>
<html lang=&#34;en&#34;>
<head>
<meta charset=&#34;UTF-8&#34;>
<title>Title</title>
</head>
<body>
<script>
alert(&#34;hello js&#34;);
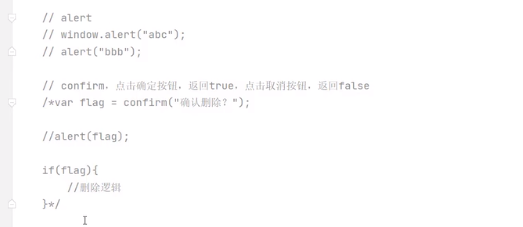
var flag=confirm(&#34;确定删除&#34;);
if(flag){
console.log(&#34;删除成功&#34;);
}else{
console.log(&#34;删除失败&#34;);
}
var i=1;
function eat(){
alert(&#34;吃东西&#34;+i)
i++;
}
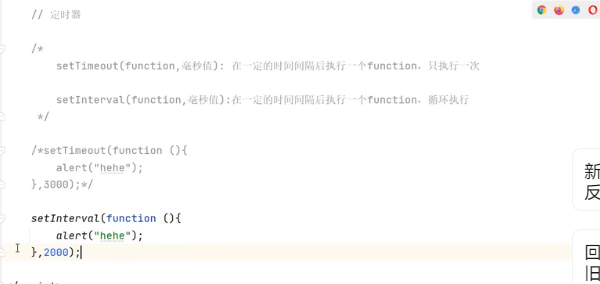
setTimeout(eat,5);
setInterval(eat,4);
</script>
</body>
</html>案例:定时器

<!DOCTYPE html>
<html lang=&#34;en&#34;>
<head>
<meta charset=&#34;UTF-8&#34;>
<title>Title</title>
</head>
<body>
<input type=&#34;button&#34; onclick=&#34;on()&#34; value=&#34;开灯&#34;>
<!--通过onclick函数名调用,不要忘记on后面()-->
<img id=&#34;myimage&#34; src=&#34;../java/img/off.gif&#34; height=&#34;180&#34; width=&#34;109&#34;/>
<!--定义id,为了后面图片方法调用-->
<input type=&#34;button&#34; onclick=&#34;off()&#34; value=&#34;关灯&#34;>
<script>
function on(){
document.getElementById(&#34;myimage&#34;).src=&#34;../java/img/on.gif&#34;;
}
function off(){
document.getElementById(&#34;myimage&#34;).src=&#34;../java/img/off.gif&#34;;
}
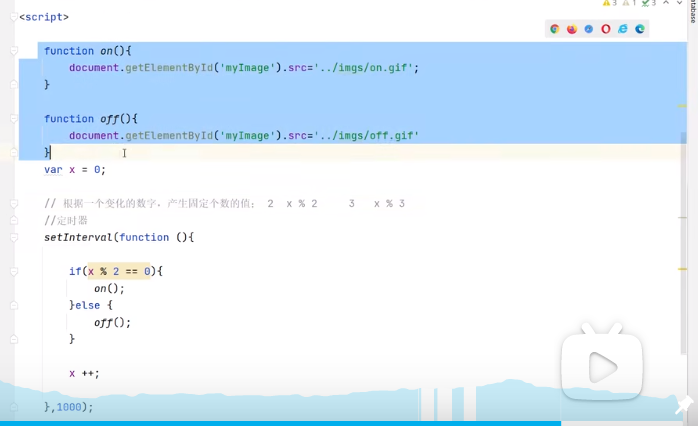
var i=0;
setInterval(function () {
if(i%2==0){
on();
}else{
off();
}
i++;
},1000);
</script>
</body>
</html>
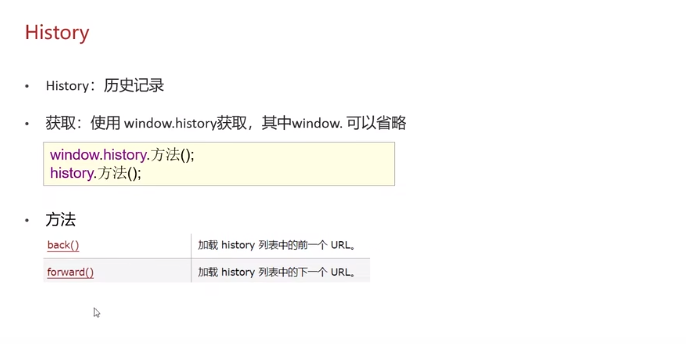
2.History
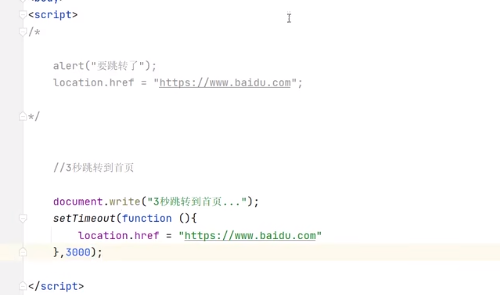
3.Location
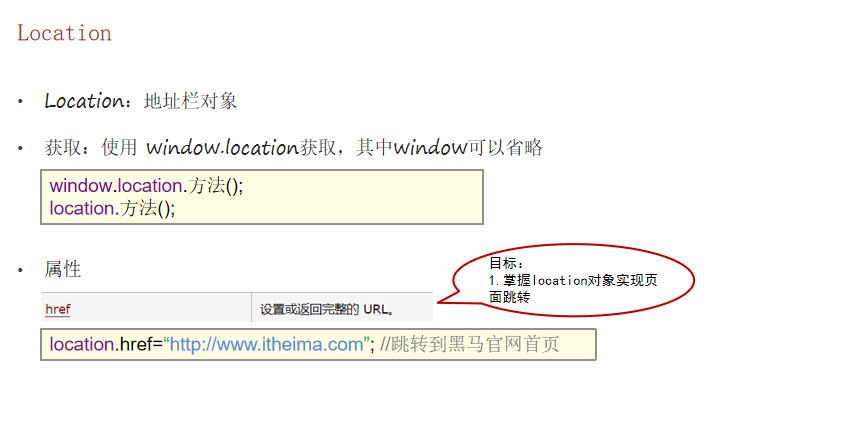
<!DOCTYPE html>
<html lang=&#34;en&#34;>
<head>
<meta charset=&#34;UTF-8&#34;>
<title>Title</title>
</head>
<body>
<script>
/* alert(&#34;跳转到百度首页&#34;);
location.href=&#34;https://www.baidu.com&#34;;*/
document.write(&#34;3s后跳转到百度首页&#34;);
setTimeout(function(){
location.href=&#34;https://www.baidu.com&#34;;
},3000)
</script>
</body>
</html>
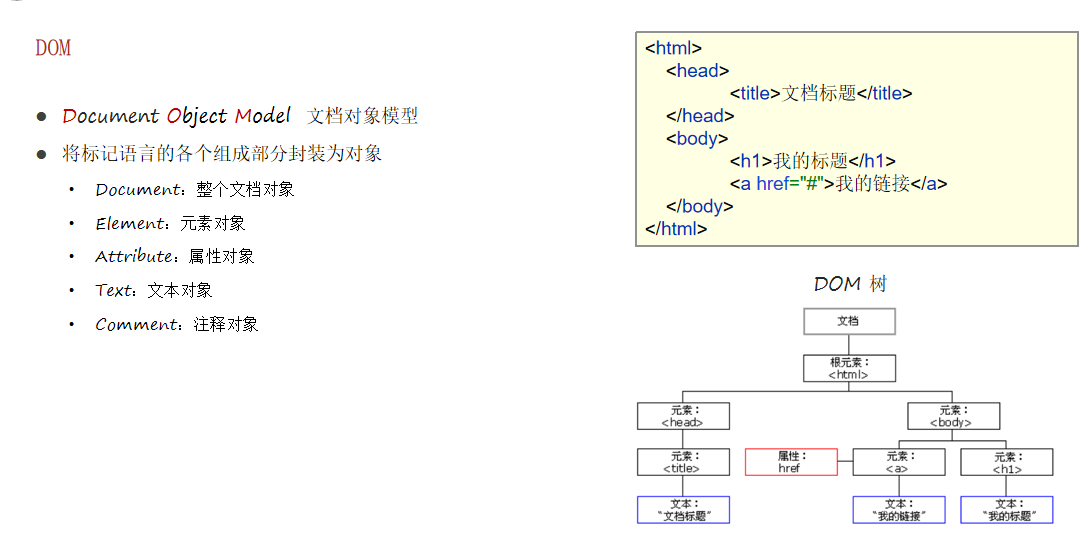
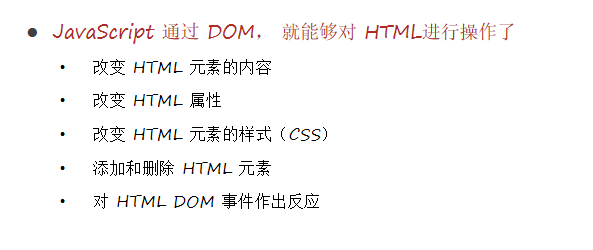
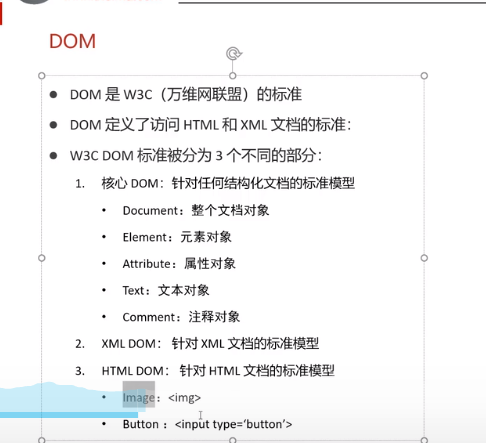
DOM
<!DOCTYPE html>
<html lang=&#34;en&#34;>
<head>
<meta charset=&#34;UTF-8&#34;>
<title>Title</title>
</head>
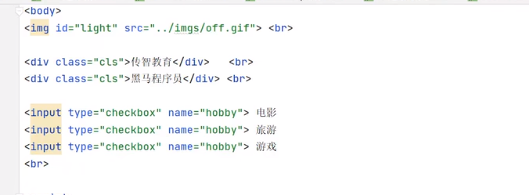
<body>
<div id=&#34;div1&#34;>黑马程序员</div>
<div class=&#34;cls&#34;>传智播客</div>
<div class=&#34;cls&#34;>传智教育</div>
<input type=&#34;checkbox&#34; name=&#34;hobby&#34;>电影
<input type=&#34;checkbox&#34; name=&#34;hobby&#34;>图片
<input type=&#34;checkbox&#34; name=&#34;hobby&#34;>绘画
<script>
var e1 = document.getElementById(&#34;div1&#34;);
console.log(e1);
var e2= document.getElementsByTagName(&#34;div&#34;);
for (let i = 0; i < e2.length; i++) {
console.log(e2);
}
var e3 = document.getElementsByClassName(&#34;cls&#34;);
for (let i = 0; i < e3.length; i++) {
console.log(e3);
}
var e4 = document.getElementsByName(&#34;hobby&#34;);
for (let i = 0; i < e4.length; i++) {
console.log(e4);
}
</script>
</body>
</html>
<!DOCTYPE html>
<html lang=&#34;en&#34;>
<head>
<meta charset=&#34;UTF-8&#34;>
<title>Title</title>
</head>
<body>
<h2 id=&#34;msg&#34;>传智播客</h2>
<img id=&#34;imgId&#34; src=&#34;../java/img/off.gif&#34; ><br>
<input type=&#34;text&#34; id=&#34;username&#34; name=&#34;username&#34; value=&#34;黑马程序员&#34;><br>
<input type=&#34;checkbox&#34; name=&#34;hobby&#34; value=&#34;sing&#34; class=&#34;cls&#34;>唱
<input type=&#34;checkbox&#34; name=&#34;hobby&#34; value=&#34;dance&#34; class=&#34;cls&#34;>跳
<input type=&#34;checkbox&#34; name=&#34;hobby&#34; value=&#34;rap&#34; class=&#34;cls&#34;>rap
<input type=&#34;checkbox&#34; name=&#34;hobby&#34; value=&#34;basketball&#34; class=&#34;cls&#34;>篮球
<script>
var e1= document.getElementById(&#34;imgId&#34;);
e1.src=&#34;../java/img/on.gif&#34;;
var e2 = document.getElementsByName(&#34;hobby&#34;);
for (let i = 0; i < e2.length; i++) {
e2.checked=true;
}
var e3=document.getElementById(&#34;msg&#34;);
e3.innerHTML=&#34;用户&#34;;
</script>
</body>
</html>
<!DOCTYPE html>
<html lang=&#34;en&#34;>
<head>
<meta charset=&#34;UTF-8&#34;>
<title>DOM-获取Element对象</title>
</head>
<body>
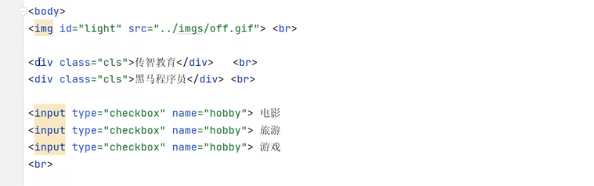
<div id=&#34;div1&#34;>黑马程序员</div>
<div class=&#34;cls&#34;>传智播客</div>
<div class=&#34;cls&#34;>传智教育</div>
<input type=&#34;checkbox&#34; name=&#34;hobby&#34;>电影</input>
<input type=&#34;checkbox&#34; name=&#34;hobby&#34;>图片</input>
<input type=&#34;checkbox&#34; name=&#34;hobby&#34;>绘画</input>
<script>
console.log(document.getElementById(&#34;div1&#34;));
var e1= document.querySelectorAll(&#34;.cls&#34;);
for (let e of e1) {
console.log(e);
}
var e3 = document.querySelectorAll(&#34;#div&#34;);
for (let e of e3) {
console.log(e);
}
/*
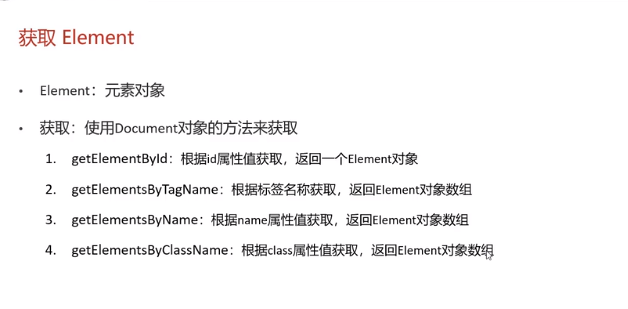
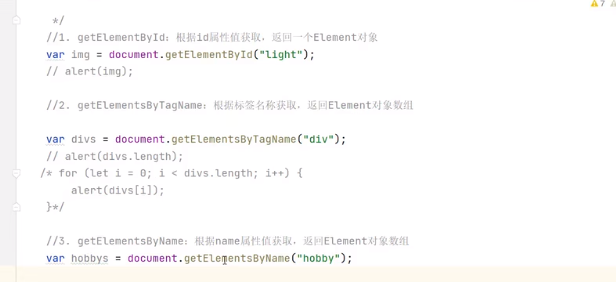
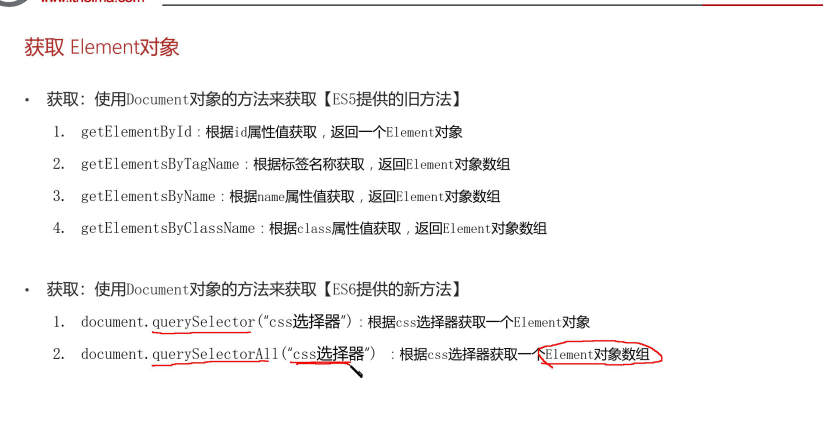
获取:使用Document对象的方法来获取
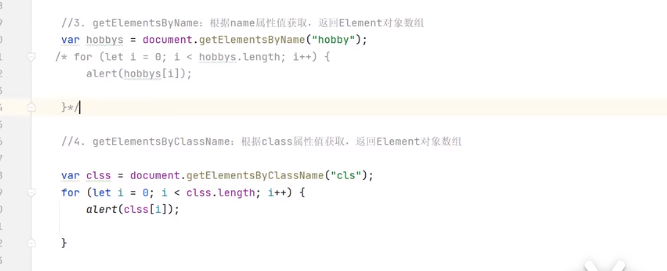
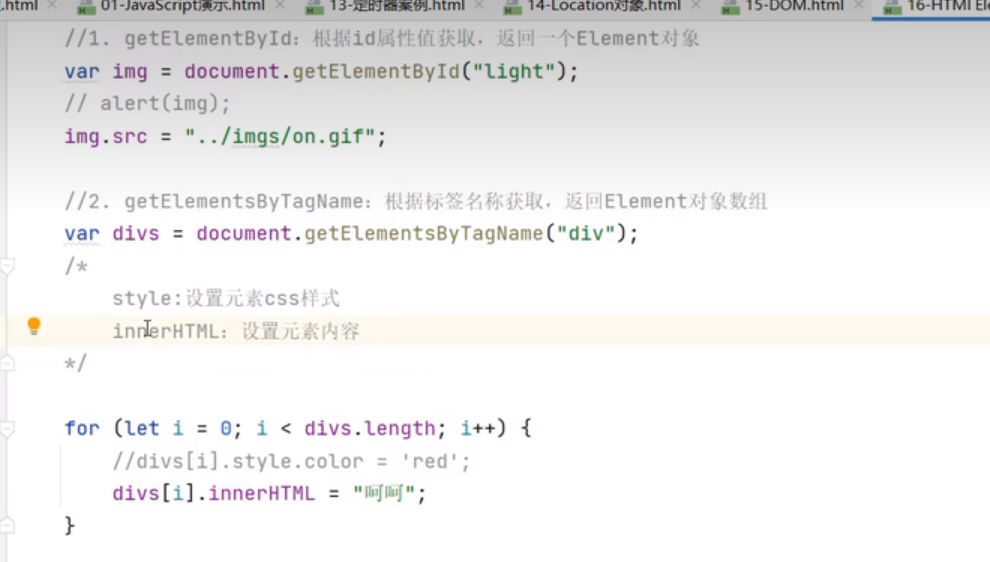
getElementById:根据id属性值获取,返回一个Element对象
getElementsByTagName:根据标签名称获取,返回Element对象数组
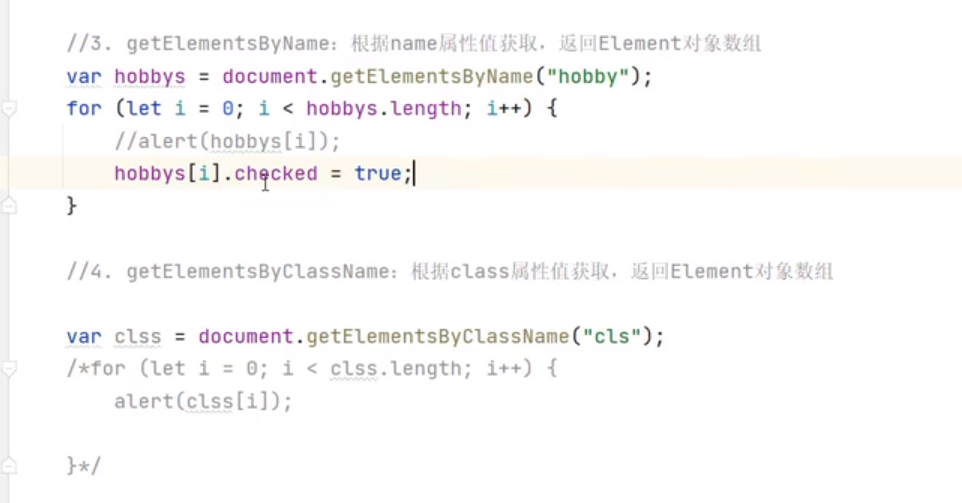
getElementsByName:根据name属性值获取,返回Element对象数组
getElementsByClassName:根据class属性值获取,返回Element对象数组
获取:使用Document对象的方法来获取【ES6提供的新方法】
document.querySelector(“css选择器”):根据css选择器获取一个Element对象
document.querySelectorAll(“css选择器”) :根据css选择器获取一个Element对象数组
*/
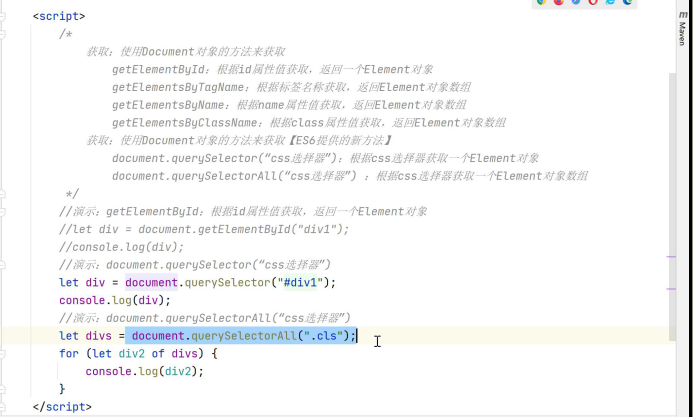
//演示:getElementById:根据id属性值获取,返回一个Element对象
//let div1 = document.getElementById(&#34;div1&#34;);
//console.log(div1);
//演示:document.querySelector(“css选择器”)
let div1 = document.querySelector(&#34;#div1&#34;);
console.log(div1);
//演示:document.querySelectorAll(“css选择器”)
let divs = document.querySelectorAll(&#34;.cls&#34;);
//遍历打印每一个div标签对象
for (let div of divs) {
console.log(div);
}
</script>
</body>
<!DOCTYPE html>
<html lang=&#34;en&#34;>
<head>
<meta charset=&#34;UTF-8&#34;>
<title>DOM-element对象的使用</title>
</head>
<body>
<h2 id=&#34;msg&#34;>传智播客</h2>
<img id=&#34;imgId&#34; src=&#34;img/off.gif&#34; ><br>
<input type=&#34;text&#34; id=&#34;username&#34; name=&#34;username&#34; value=&#34;黑马程序员&#34;><br>
<input type=&#34;checkbox&#34; name=&#34;hobby&#34; value=&#34;sing&#34; class=&#34;cls&#34;>唱
<input type=&#34;checkbox&#34; name=&#34;hobby&#34; value=&#34;dance&#34; class=&#34;cls&#34;>跳
<input type=&#34;checkbox&#34; name=&#34;hobby&#34; value=&#34;rap&#34; class=&#34;cls&#34;>rap
<input type=&#34;checkbox&#34; name=&#34;hobby&#34; value=&#34;basketball&#34; class=&#34;cls&#34;>篮球
<script>
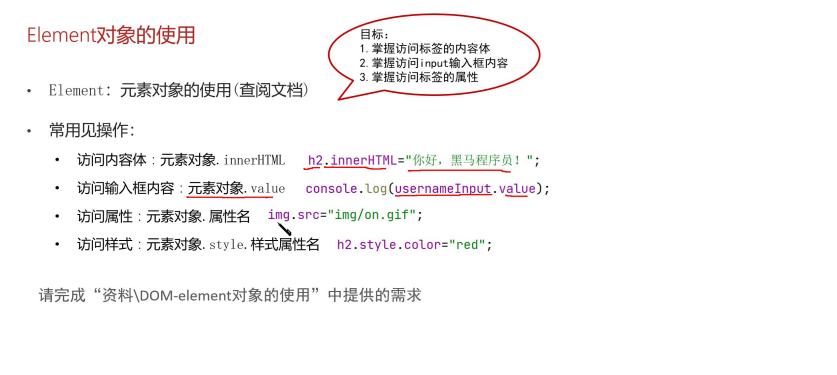
let e1 = document.getElementById(&#34;msg&#34;);
e1.innerHTML=&#34;你好,黑马程序员!&#34;;
e1.innerHTML+=&#34;你好,黑马程序员!&#34;;
let e2 = document.querySelector(&#34;#imgId&#34;);
e2.src=&#34;img/on.gif&#34;;
console.log(document.querySelector(&#34;#username&#34;).value);
e1.style.color=&#34;red&#34;;
e1.style.fontSize=&#34;30px&#34;;
let e3 = document.querySelectorAll(&#34;.cls&#34;);
for (let i = 0; i < e3.length; i++) {
e3.checked=true;
}
/* //需求1:将传智播客修改成&#34;你好,黑马程序员!&#34;,如果是追加呢?
//1 获取标签对象
let h2 = document.querySelector(&#34;#msg&#34;);
//2 操作标签对象(内容体、属性、样式、...)
//h2.innerHTML=&#34;你好,黑马程序员!&#34;;
//如果是追加呢?
//h2.innerHTML+=&#34; 你好,黑马程序员!&#34;;
//给标签的innerHTML属性赋值,字符串中如果有html代码,浏览器能解析
h2.innerHTML+=&#34; <font color=&#39;red&#39;>你好,黑马程序员!</font>&#34;;
//需求2:实现开灯效果
//1 获取标签对象
let img = document.querySelector(&#34;#imgId&#34;);
//2 操作标签对象(内容体、属性、样式、...)
img.src=&#34;img/on.gif&#34;;
//需求3:获取用户名输入框中的内容
//1 获取标签对象
//2 操作标签对象(内容体、属性、样式、...)
let username = document.querySelector(&#34;#username&#34;).value;
console.log(username);
//需求4:将h2标签的内容字体设置成红色
//1 获取标签对象【不用做,前面已经获取了】
//2 操作标签对象(内容体、属性、样式、...)
h2.style.color=&#34;red&#34;;
h2.style.fontSize=&#34;50px&#34;;
//需求5:将上述爱好全部选中
//1 获取标签对象
let checkboxs = document.querySelectorAll(&#34;.cls&#34;);
//2 操作标签对象(内容体、属性、样式、...)
for (let checkbox of checkboxs) {
checkbox.checked=true;
}*/
</script>
</body>
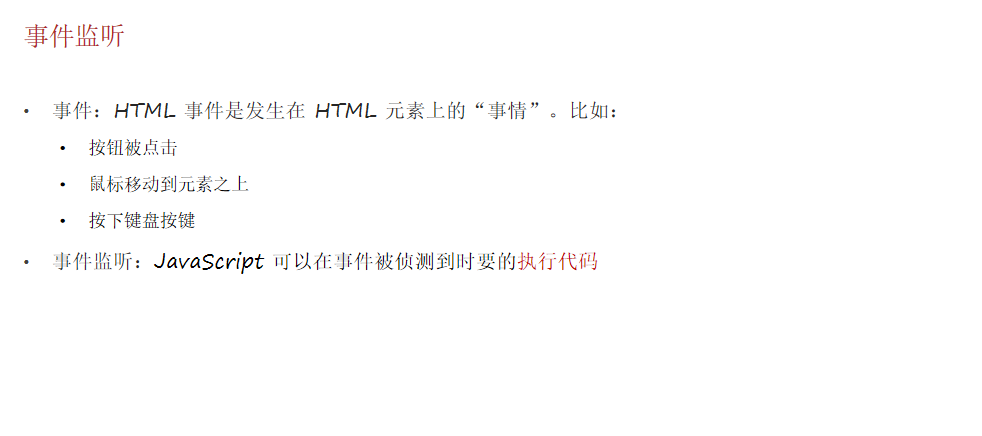
</html>事件监听
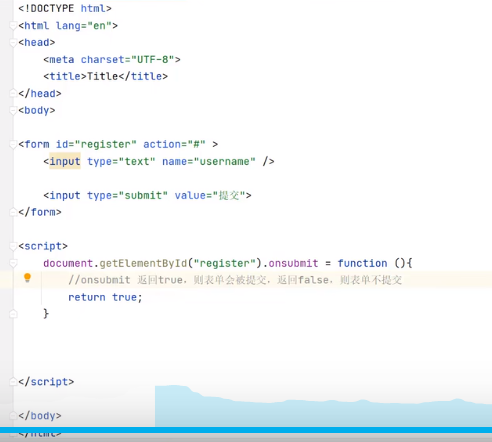
1.事件绑定

<!DOCTYPE html>
<html lang=&#34;en&#34;>
<head>
<meta charset=&#34;UTF-8&#34;>
<title>DOM-事件概念和事件绑定</title>
</head>
<body>
<img id=&#34;imgId&#34; src=&#34;img/off.gif&#34; ><br>
<!--1 在标签上添加事件属性,属性值是要执行的函数-->
<input type=&#34;button&#34; value=&#34;开灯&#34; onclick=&#34;on()&#34;>
<input type=&#34;button&#34; value=&#34;关灯&#34; onclick=&#34;off()&#34;>
<script>
function on(){
document.querySelector(&#34;#imgId&#34;).src=&#34;img/on.gif&#34;;
}
function off(){
document.querySelector(&#34;#imgId&#34;).src=&#34;img/off.gif&#34;;
}
/*
方式1:通过 HTML标签中的事件属性进行绑定
步骤:
1 在标签上添加事件属性,属性值是要执行的函数
2 定义事件绑定的函数
*/
//需求:点击“开灯”和“关灯”按钮,实现图片切换展示开灯和关灯的效果。
/* function on() {
//修改img标签的src属性
document.querySelector(&#34;#imgId&#34;).src=&#34;img/on.gif&#34;;
}
function off() {
//修改img标签的src属性
document.querySelector(&#34;#imgId&#34;).src=&#34;img/off.gif&#34;;
}*/
</script>
</body>
</html>
<!DOCTYPE html>
<html lang=&#34;en&#34;>
<head>
<meta charset=&#34;UTF-8&#34;>
<title>DOM-事件概念和事件绑定</title>
</head>
<body>
<img id=&#34;imgId&#34; src=&#34;img/off.gif&#34; ><br>
<input type=&#34;button&#34; value=&#34;开灯&#34; id=&#34;onBtn&#34;>
<input type=&#34;button&#34; value=&#34;关灯&#34; id=&#34;offBtn&#34;>
<script>
document.querySelector(&#34;#onBtn&#34;).onclick=function(){
document.querySelector(&#34;#imgId&#34;).src=&#34;img/on.gif&#34;;
}
document.querySelector(&#34;#offBtn&#34;).onclick=function(){
document.querySelector(&#34;#imgId&#34;).src=&#34;img/off.gif&#34;;
}
/*
方式2:通过DOM元素对象属性绑定
步骤:
1 获取元素对象,给事件属性绑定匿名函数
2 在绑定的函数中进行DOM操作
*/
//需求:点击“开灯”和“关灯”按钮,实现图片切换展示开灯和关灯的效果。
//实现开灯
//1 获取元素对象,给事件属性绑定匿名函数
/* document.querySelector(&#34;#onBtn&#34;).onclick=function () {
//修改img标签的src属性
document.querySelector(&#34;#imgId&#34;).src=&#34;img/on.gif&#34;;
}
//实现关灯
//1 获取元素对象,给事件属性绑定匿名函数
document.querySelector(&#34;#offBtn&#34;).onclick=function () {
//修改img标签的src属性
document.querySelector(&#34;#imgId&#34;).src=&#34;img/off.gif&#34;;
}
*/
</script>
</body>
</html>
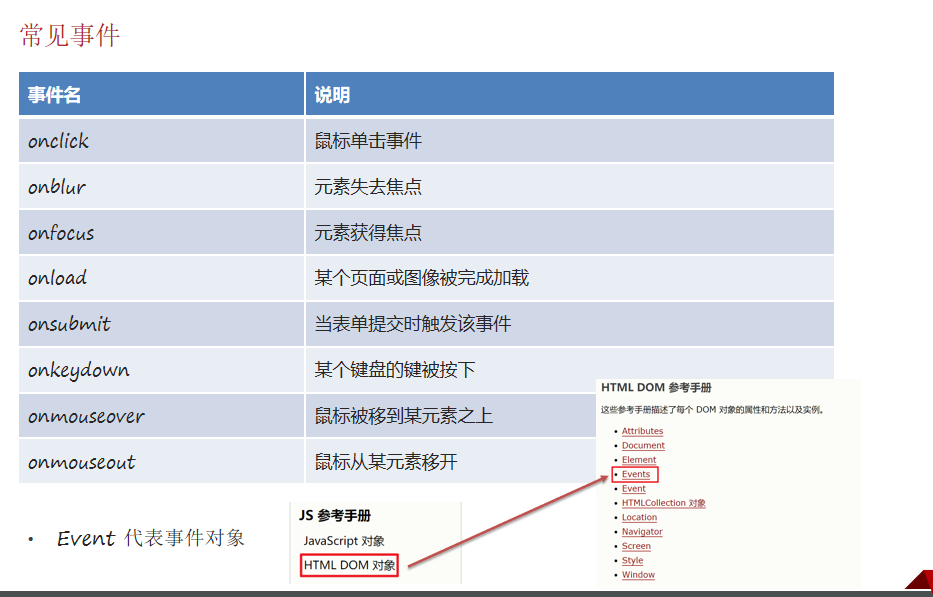
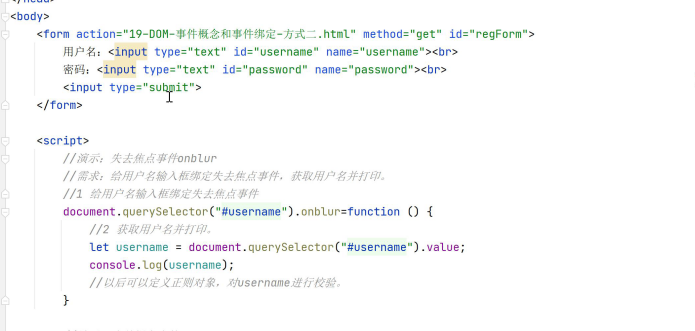
2.常见事件
3.案例
<!DOCTYPE html>
<html lang=&#34;en&#34;>
<head>
<meta charset=&#34;UTF-8&#34;>
<title>DOM-常见事件</title>
</head>
<body>
<form action=&#34;19-DOM-事件概念和事件绑定-方式二.html&#34; method=&#34;get&#34; id=&#34;regForm&#34;>
用户名:<input type=&#34;text&#34; id=&#34;username&#34; name=&#34;username&#34;><br>
密码:<input type=&#34;text&#34; id=&#34;password&#34; name=&#34;password&#34;><br>
<input type=&#34;submit&#34;>
</form>
<script>
document.querySelector(&#34;#username&#34;).onblur=function(){
console.log(document.querySelector(&#34;#username&#34;).value);
}
document.querySelector(&#34;#regForm&#34;).onsubmit=function(){
console.log(&#34;表单函数执行了&#34;);
return true;
}
/* //演示:失去焦点事件onblur
//1 给用户名输入框绑定失去焦点事件
document.querySelector(&#34;#username&#34;).onblur=function () {
//2 失去焦点之后获取输入框中的内容并打印
let username=document.querySelector(&#34;#username&#34;).value;
console.log(username);
}
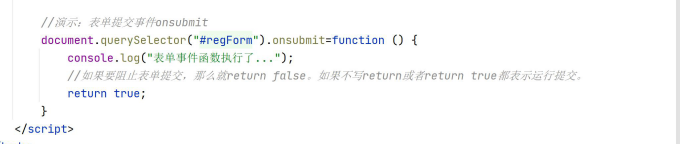
//演示:表单提交事件onsubmit
document.querySelector(&#34;#regForm&#34;).onsubmit=function () {
console.log(&#34;表单提交事件执行了,将来在此处需要校验每个输入框&#34;)
//通过return false阻止提交。如果不return false默认就是提交。
return true; //false表示阻止提交,true或者不返回任何值表示运行提交
}*/
</script>
</body>
</html>

替换文本ctrl+r;
<!DOCTYPE html>
<html lang=&#34;en&#34;>
<head>
<meta charset=&#34;UTF-8&#34;>
<title>欢迎注册</title>
<link href=&#34;css/register.css&#34; rel=&#34;stylesheet&#34;>
</head>
<body>
<div class=&#34;form-div&#34;>
<div class=&#34;reg-content&#34;>
<h1>欢迎注册</h1>
<span>已有帐号?</span> <a href=&#34;#&#34;>登录</a>
</div>
<form id=&#34;reg-form&#34; action=&#34;19-DOM-事件概念和事件绑定-方式二.html&#34; method=&#34;post&#34;>
<table>
<tr>
<td>用户名</td>
<td class=&#34;inputs&#34;>
<input name=&#34;username&#34; type=&#34;text&#34; id=&#34;username&#34; placeholder=&#34;请输入6~12位字母、数字、下划线&#34;>
<br>
<span id=&#34;username_err&#34; class=&#34;err_msg&#34; style=&#34;display: none&#34;>用户名不符合要求</span>
</td>
</tr>
<tr>
<td>密码</td>
<td class=&#34;inputs&#34;>
<input name=&#34;password&#34; type=&#34;password&#34; id=&#34;password&#34; placeholder=&#34;请输入6~12位字母、数字、下划线&#34;>
<br>
<span id=&#34;password_err&#34; class=&#34;err_msg&#34; style=&#34;display: none&#34;>密码不符合要求</span>
</td>
</tr>
<tr>
<td>手机号</td>
<td class=&#34;inputs&#34;><input name=&#34;tel&#34; type=&#34;text&#34; id=&#34;tel&#34; placeholder=&#34;请输入11位手机号&#34;>
<br>
<span id=&#34;tel_err&#34; class=&#34;err_msg&#34; style=&#34;display: none&#34;>手机号不符合要求</span>
</td>
</tr>
</table>
<div class=&#34;buttons&#34;>
<input value=&#34;注 册&#34; type=&#34;submit&#34; id=&#34;reg_btn&#34;>
</div>
<br class=&#34;clear&#34;>
</form>
</div>
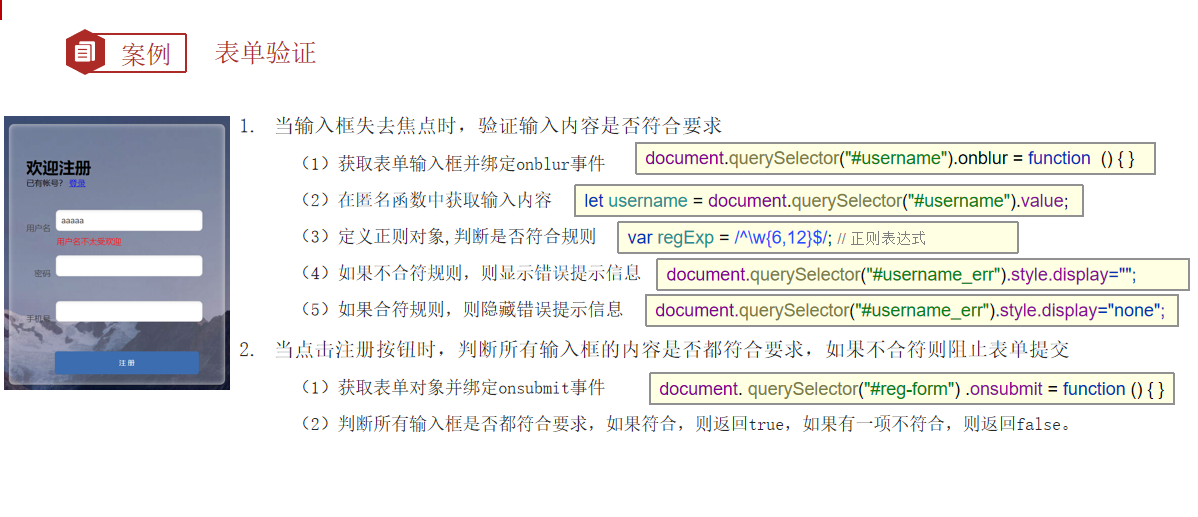
<script>
//需求1:用户名、密码、手机号三个输入框失去焦点之后分别校验
document.querySelector(&#34;#password&#34;).onblur=function(){
checkps();
}
document.querySelector(&#34;#username&#34;).onblur=function(){
checkus();
}
document.querySelector(&#34;#tel&#34;).onblur=function(){
checktel();
}
function checkus(){
let us = document.querySelector(&#34;#username&#34;).value;
let regExp1=/^\w{6,12}$/;
flag=regExp1.test(us);
if(flag){
document.querySelector(&#34;#username_err&#34;).style.display=&#34;none&#34;;
}else{
document.querySelector(&#34;#username_err&#34;).style.display=&#34;&#34;;
}
return flag;
}
function checkps(){
let ps = document.querySelector(&#34;#password&#34;).value;
let regExp1=/^\w{6,12}$/;
flag=regExp1.test(ps);
if(flag){
document.querySelector(&#34;#password_err&#34;).style.display=&#34;none&#34;;
}else{
document.querySelector(&#34;#password_err&#34;).style.display=&#34;&#34;;
}
return flag;
}
function checktel(){
let ps = document.querySelector(&#34;#tel&#34;).value;
let regExp1=/^1[356789]\d{9}$/;
flag=regExp1.test(ps);
if(flag){
document.querySelector(&#34;#tel_err&#34;).style.display=&#34;none&#34;;
}else{
document.querySelector(&#34;#tel_err&#34;).style.display=&#34;&#34;;
}
return flag;
}
document.querySelector(&#34;#reg-form&#34;).onsubmit=function(){
let flag1 =checkps();
let flag2=checkus();
let flag3=checktel();
if(flag1&&flag2&&flag3){
return true;
}else{
return false;
}
}
</script>
<!--
<script>
//需求1:用户名、密码、手机号三个输入框失去焦点之后分别校验
//-&#45;&#45;&#45;&#45;&#45;&#45;&#45;&#45;&#45;&#45;&#45;&#45;校验用户名输入框-&#45;&#45;&#45;&#45;&#45;&#45;&#45;&#45;&#45;&#45;&#45;&#45;&#45;&#45;&#45;&#45;&#45;&#45;&#45;&#45;
//1 给输入框绑定失去焦点事件onblur
document.querySelector(&#34;#username&#34;).onblur=function () {
checkUsername();
}
function checkUsername() {
//2 在匿名函数中获取输入框的内容
let username=document.querySelector(&#34;#username&#34;).value;
//3 定义正则表达式对象,调用test方法开始校验
let regExp=/^\w{6,12}$/;
let flag = regExp.test(username);
//判断
if(flag){
//5 如果校验成功,隐藏操作信息
document.querySelector(&#34;#username_err&#34;).style.display=&#34;none&#34;;
}else{
//4 如果校验失败,显示错误信息
document.querySelector(&#34;#username_err&#34;).style.display=&#34;&#34;;
}
//返回校验结果
return flag;
}
//-&#45;&#45;&#45;&#45;&#45;&#45;&#45;&#45;&#45;&#45;&#45;&#45;校验密码输入框-&#45;&#45;&#45;&#45;&#45;&#45;&#45;&#45;&#45;&#45;&#45;&#45;&#45;&#45;&#45;&#45;&#45;&#45;&#45;&#45;
//1 给输入框绑定失去焦点事件onblur
document.querySelector(&#34;#password&#34;).onblur=function () {
checkPassword();
}
function checkPassword() {
//2 在匿名函数中获取输入框的内容
let password=document.querySelector(&#34;#password&#34;).value;
//3 定义正则表达式对象,调用test方法开始校验
let regExp=/^\w{6,12}$/;
let flag = regExp.test(password);
//判断
if(flag){
//5 如果校验成功,隐藏操作信息
document.querySelector(&#34;#password_err&#34;).style.display=&#34;none&#34;;
}else{
//4 如果校验失败,显示错误信息
document.querySelector(&#34;#password_err&#34;).style.display=&#34;&#34;;
}
//返回校验结果
return flag;
}
//-&#45;&#45;&#45;&#45;&#45;&#45;&#45;&#45;&#45;&#45;&#45;&#45;校验手机号输入框-&#45;&#45;&#45;&#45;&#45;&#45;&#45;&#45;&#45;&#45;&#45;&#45;&#45;&#45;&#45;&#45;&#45;&#45;&#45;&#45;
document.querySelector(&#34;#tel&#34;).onblur=function () {
checkTel();
}
function checkTel() {
//2 在匿名函数中获取输入框的内容
let tel=document.querySelector(&#34;#tel&#34;).value;
//3 定义正则表达式对象,调用test方法开始校验
let regExp=/^1[356789]\d{9}$/;
let flag = regExp.test(tel);
//判断
if(flag){
//5 如果校验成功,隐藏操作信息
document.querySelector(&#34;#tel_err&#34;).style.display=&#34;none&#34;;
}else{
//4 如果校验失败,显示错误信息
document.querySelector(&#34;#tel_err&#34;).style.display=&#34;&#34;;
}
//返回校验结果
return flag;
}
//需求2:点击注册按钮之后,校验用户名、密码、手机号三个输入框数据是否合法,如果不合法就阻止提交。
//1 给form表单绑定onsubmit提交事件
document.querySelector(&#34;#reg-form&#34;).onsubmit=function () {
//2 在提交事件函数中校验所有输入框中的内容,有一个不合法就返回false,都合法才返回true。
return checkUsername() && checkPassword() && checkTel();
}
*/
-->
</script>
</body>
</html> |
|


 发表于 2022-9-22 09:25:53